


Your first thought when reading this post might be what the heck is a sleeve board?! That has been the question most of my friends and family have asked me when I get excited about my latest DIY! A sleeve board is a mini ironing board that fits right into the sleeves of a man’s dress shirt. As the wife of a teacher, who wears a dress shirt every day, this has been a longed-for tool for the past two years of teaching—I simply can’t deal with the crease that ironing creates in every sleeve I iron! After a long and daunting hunt for a sturdy antique sleeveboard, I’ve discovered that they all are nasty & will need a little DIY love, so today I present to you How to Clean Up an Old Sleeve Board:
Note: Some links in the following post may be affiliate links. This means that, should you choose to click and purchase through these links, I may receive compensation. This is how I can provide you with great tutorials like this, at no cost! Thanks for your support!
Here’s the before…eek! That is not anything that I want my clothing to be touching!

I started by removing the old icky fabric and seeing what is underneath. I was pleasantly surprised to find the foam and other interior fabric in good condition. You might not be so lucky. If you need, replace the foam by tracing out the shape of the board and cutting out the foam with a serrated knife (my secret weapon for cutting foam: the electric turkey carver you only use at Thanksgiving…if you remember that you have it!).
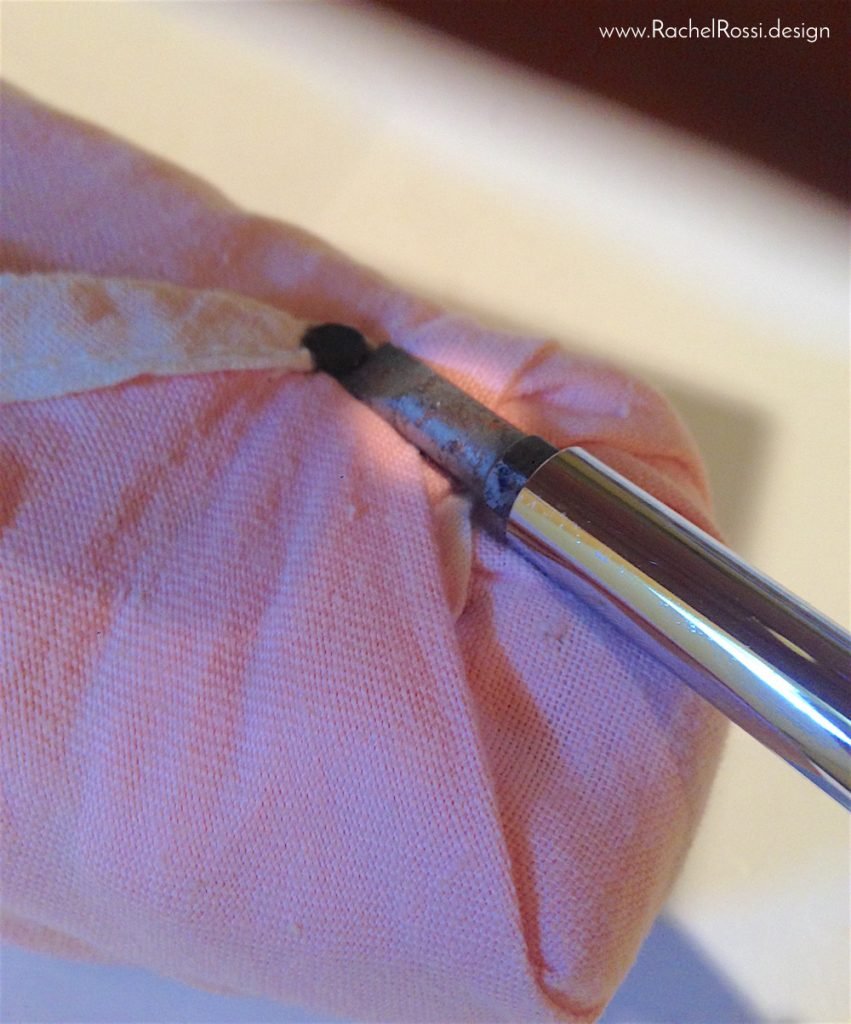
On my sleeve board, the fabric was held in with a mix of furniture brads and thumb tacks. You might need a pair or plyers or a flat head screw driver to get these out!
Next, it’s time to cut out your new fabric. I used a quilting cotton so that it would match the curtains in the laundry room. Lay the foam out on the fabric and measure out about 3″ from all sides. Cutting doesn’t have to be precise, as you can always trim later.

Find a firm surface (not the washer shown in the picture…ehem) and lay out all your pieces. If the foot of the stand comes off, make your life easier and remove that for now.
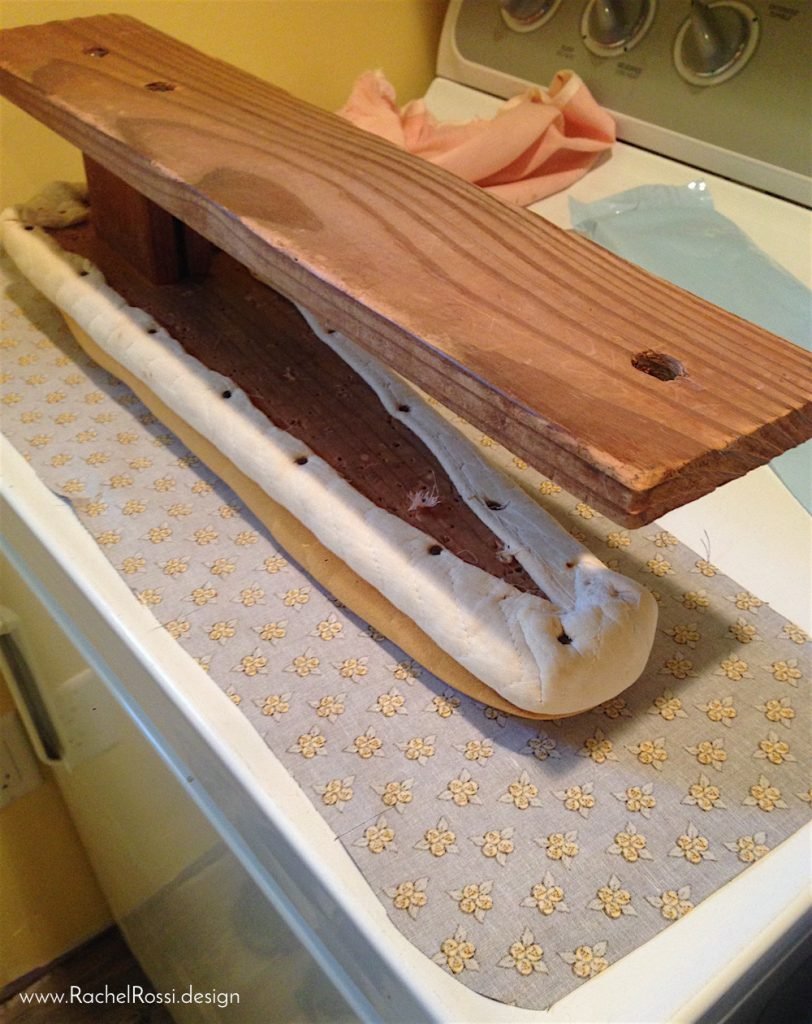
Lay out your pieces in order: fabric, foam, and board. Make sure fabric is flat and foam is lined up.
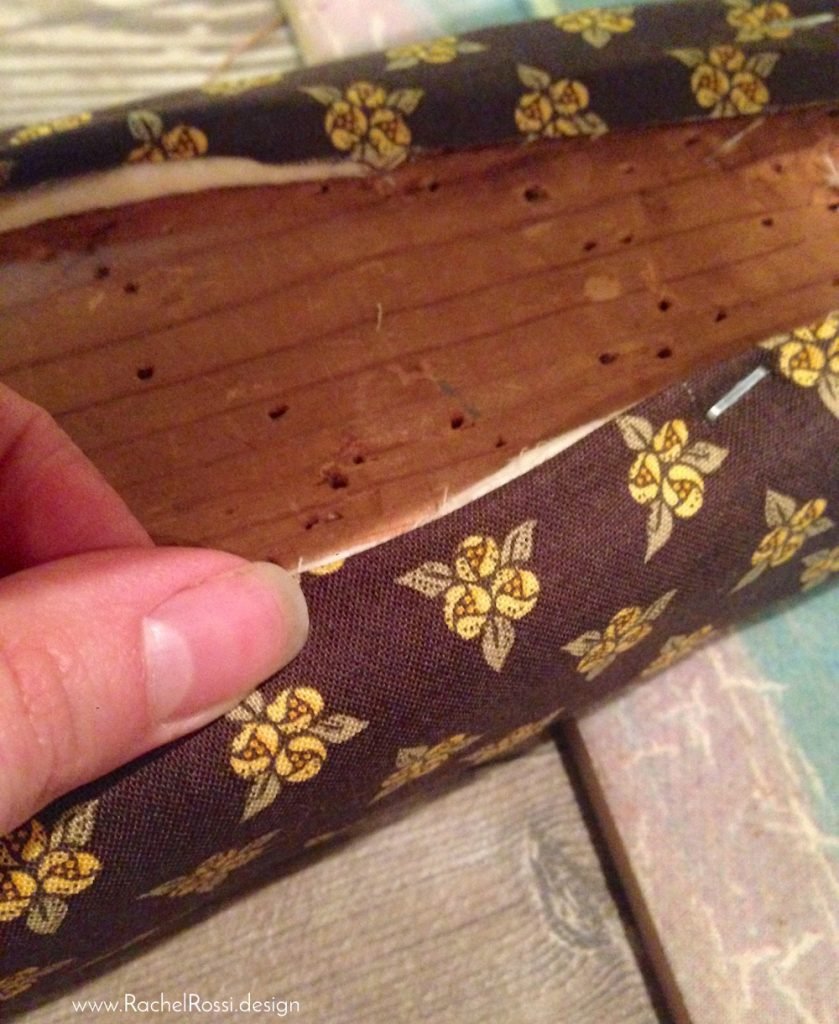
Next, you’ll carefully wrap your fabric under one side and staple with a staple gun. I prefer to fold under about 1/2″ to ensure that there aren’t any edges fraying on the underside. Place about 1-2 staples on one side.
Turn the whole piece over. Make sure that the fabric is sitting in the correct position and then return it to the laying down position. On the side opposite what you just stapled, staple 2 more spots into place. Make sure the the fabric is pulled tight. Repeat this on opposing ends. Continue working your way around the board in this way, checking for tightness as you go.
When you come to a tight or rounded corner, take your time! There will be a bunch of fabric underneath your project, but no one will ever see it! Just make sure that you make tiny folds as you go so that the top is flat.

That’s all there is to it! Make sure that you put plenty of staples in to hold everything in place & get ironing! Mmmmmmm…no more creased sleeves for the school year
Enjoy reading this post? To make sure you don’t miss a thing, follow me on Pinterest, Facebook, and Instagram and sign up for an email subscription to my blog.