


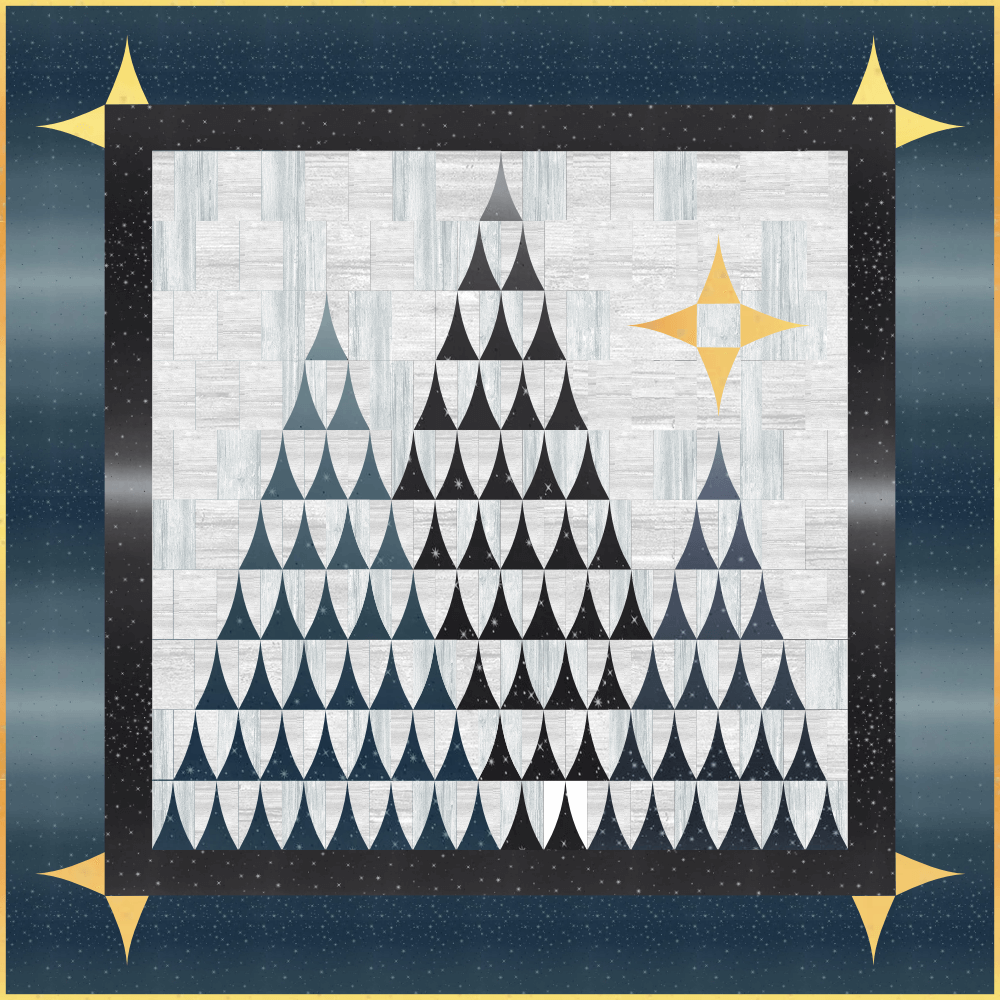
Well hello there! Today I want to bring you a post that was inspired by a sweet customer of mine. She’s a newer quilter and had a few questions on how to use ombre fabric (like the fab V & Co Fairy Dust on the cover) in her Christmas quilt. I gladly answered her email and figured since I’ve done the work already, that I’d share with you as well.
First Off, Classes ARE Coming
Before we dive in, I did want to let you know that a virtual mini-class is now available!! You can join today and get started now, or work at your own pace.

I’ll be using the ombre fabrics and explain all of this in more detail, so if you prefer video, then this is the class for you!
How Much Fabric Do I Need?
Great question!
On the back of my pattern you’ll see a note saying that if you plan to use an ombre fabric for the trees, you’ll need additional yardage:
- Small tree: 3/4 yards
- Medium Tree: 1-1/4 yards
- Large Tree: 1-1/4 yards
I then go on to be a little vague about the border yardage, because it really depends on how you want to do it. Your choice will decide how much fabric you’ll need to buy. SO, here are your choices:
Border Option A: Ebb & Flow (and save some dough)

If you:
✔️ Like the idea of your borders going from light to dark and back again ALL the way around your quilt
✔️ Want to save some money
✔️ Want to make this as simple as possible
…then you’re going to use the fabric requirements as listed and cut as instructed…easy peasy!
Border Option B: Exactly as seen on the cover quilt
If you:
✔️ Want to get the same look as the cover quilt borders
✔️ Don’t mind paying more
✔️ Can follow a cutting diagram
…then you’re going to follow the instructions for your size below:
QUEEN sizes:
Purchase:
✔️ 3-1/2 yards of the Onyx Fairy Dust Border (1st & 3rd borders)
✔️ 3 yards of the Lagoon Fairy Dust Border (2nd border).
QUEEN Cutting Diagram – Borders 1 & 3 (assumes both borders are the same color)
If this is too small, right click the image and click “open image in new tab” – then you’l see it nice and big!
I suggest to start but cutting and piecing the side borders. Once those are stitched onto the quilt top, take into account the flow of the ombre and use the remaining yardage to selectively cut top and bottom strips.

QUEEN Cutting Diagram – Border 2
If this is too small, right click the image and click “open image in new tab” – then you’l see it nice and big!
I suggest to start but cutting and piecing the side borders. Once those are stitched onto the quilt top, take into account the flow of the ombre and use the remaining yardage to selectively cut top and bottom strips.

…and YES, you’re could waste an enormous amount of fabric doing this OR you could use it as an awesome accent in the backing of your quilt.
KING sizes:
Purchase:
✔️ 3-1/2 yards of the Onyx Fairy Dust Border (1st & 3rd borders)
✔️ 4-3/4 yards of the Lagoon Fairy Dust Border (2nd & 4th borders)
KING Cutting Diagram – Borders 1 & 3 (assumes both borders are the same color)
If this is too small, right click the image and click “open image in new tab” – then you’l see it nice and big!
I suggest to start but cutting and piecing the side borders. Once those are stitched onto the quilt top, take into account the flow of the ombre and use the remaining yardage to selectively cut top and bottom strips.
KING Cutting Diagram – Borders 2 & 4 (assumes both borders are the same color)
If this is too small, right click the image and click “open image in new tab” – then you’l see it nice and big!
I suggest to start but cutting and piecing the side borders. Once those are stitched onto the quilt top, take into account the flow of the ombre and use the remaining yardage to selectively cut top and bottom strips.

…and YES, you’re could waste an enormous amount of fabric doing this OR you could use it as an awesome accent in the backing of your quilt.
How Do I Cut The Triangles?
Now that you’re home from the store, you’re probably wondering how to tackle this…
Hey – never fear! We got this. Let’s break this down:
Cutting Trees
Cutting the trees is no more difficult because of your fabric choices. You just want to make sure that you’re cutting it in a way that allows you to get the ombre effect you’re after.
✔️ Cut lengthwise strips (this will be OPPOSITE what you are used to). This way you’ll end up cutting your Shorthand Template pieces so that the gradient runs horizontally across the curved triangle. You’ll get six strips (3 sets of mirrored fabrics) out of each cut.

✔️ Then you’ll cut your Shorthand Templates as usual: alternate the A shape from right-side-up to up-side-down (Check out a video here) Read the next part before cutting!

✔️ Carefully keep each type of cut in it’s own pile and label them! You’d be shocked at how easily these all start to look the same.
For example, working from left to right in the photo below, I have 6 piles:
1: Strip 1, right-side-up
2: Strip 1, up-side-down
3: Strip 2, right-side-up
4: Strip 2, up-side-down
5: Strip 3, right-side up
6: Strip 4, up-side-down

✔️ I suggest cutting out a few extra triangles. This will allow you to really get the ombre effect that you’re looking for.
How Do I Piece This?
Next it’s time to piece!
Now that you’ve got the ombré figured out, it’s time to stitch this puppy together!
Check out my video tutorials on stitching and trimming Shorthand blocks here.

GIVE ME A CLASS!
I know, I know…so many of you prefer video instruction and I’ve got it for you! The Oh, Tannenbaum! mini class is now available!
This will be a mini class, I plan to go through step-by-step, covering all important details and techniques such as:
- Fabric Selection
- Keeping ombre fabrics and blocks in order
- How to sew Shorthand Blocks
- Creating The Star (Steps 9-10), I know that trips people up sometimes!
- How to piece borders on an angle
- Ideas for quilting and finishing
Comments are closed.