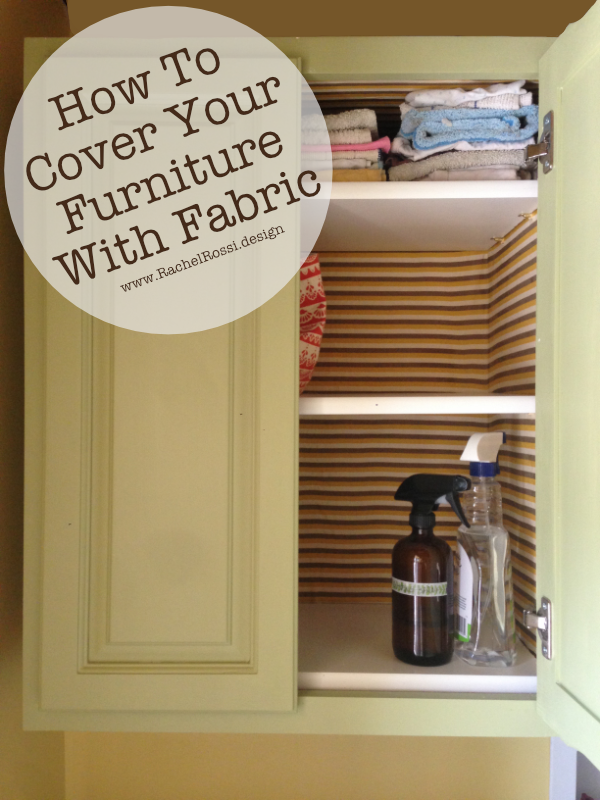
Today is a short and sweet tutorial on how to add fabric to the inside of your cabinets, bookshelves, or other boring storage units! This all started when I got free cabinet doors and frames for my laundry room and had to build the box. I figured it all out pretty well, and using 3/4″ plywood, I made myself some pretty great cabinets! When we went to paint the insides though, we discovered that plywood doesn’t always get the best coverage. So, I moved on to plan B and decided to cover up the plywood interiors with something lovely! And what is more lovely than fabric?! If you’d like to learn how to add fabric to your furniture, be sure to follow the tutorial below!
What You’ll Need:
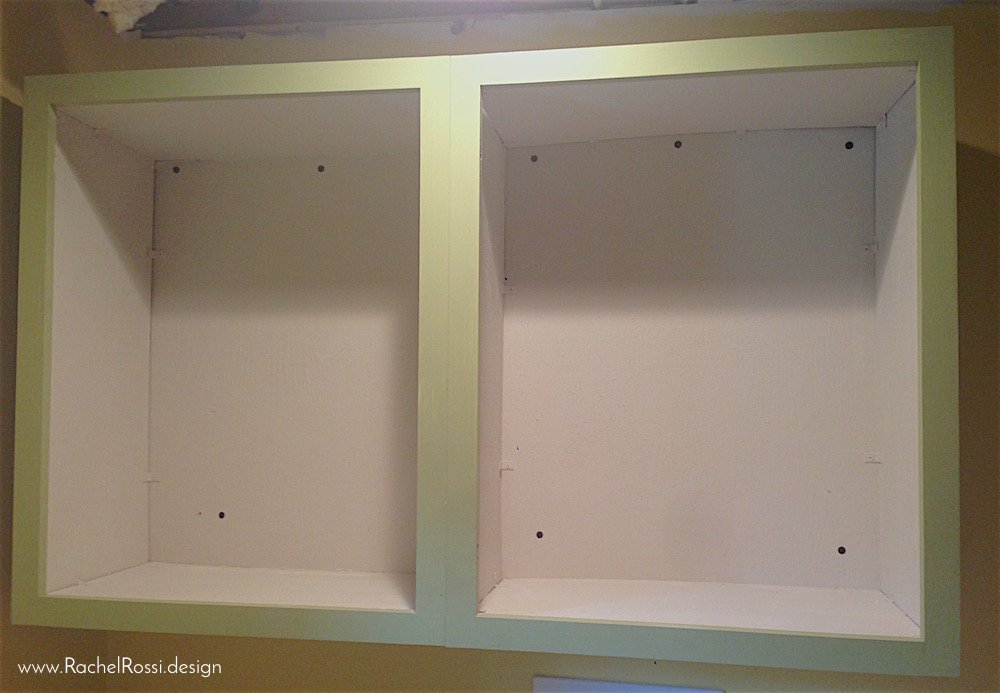
Here’s the supplies you’ll need to go from this:
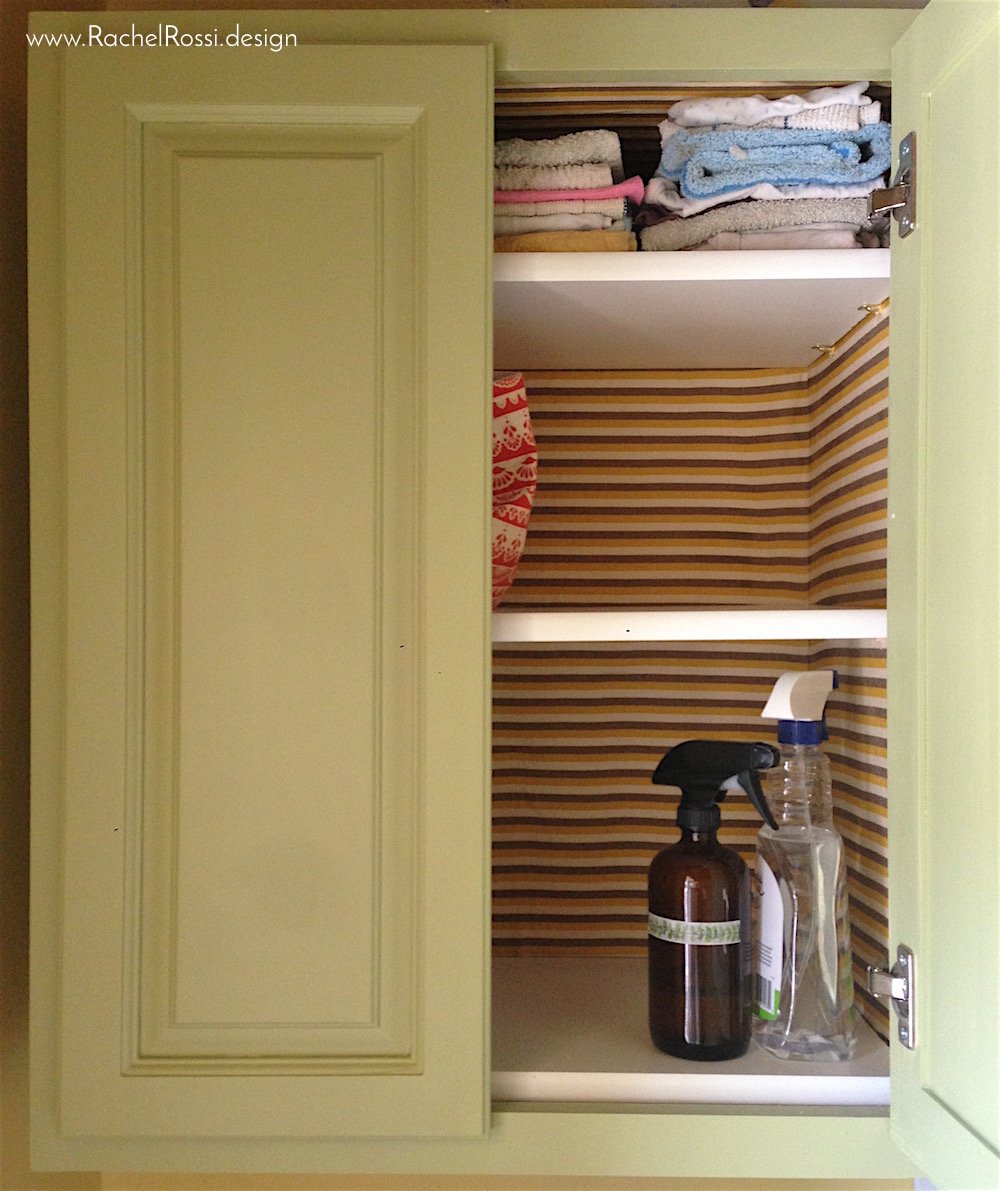
to this:
- Fabric (measurement varies by the size of your project, see below for directions on how to calculate)
- Mod Podge
- Old credit or ID card
- Paint Brush
- Erasable Fabric Maker or Pen
- Measuring Tape
Measuring it out
Every good project starts with some old-fashioned measuring. My cabinet interior measured 28″ from top to bottom, and 22.75″ from side to side. Each side and bottom was 11.875″ wide. I wanted to cover the top, back, and sides of the cabinet with fabric. You’re welcome to just do the back or sides—I will say that the less sides you do—the easier this project becomes.
First, I made a diagram of what I needed to cut. I wanted all the sides to be connected so, I cut out a piece of fabric that looked like this:

Then I went ahead and cut my fabric. I started by cutting a rectangle that measured 46-1/2″ x 39-7/8″ This is what I got when I added up the measurements from the cabinet as shown above.

After the rectangle was cut, I made two square cuts out of the top corner. Your cabinet should have the same width for the top and sides, so make sure you cut a square out. I cut an 11-7/8″ square because that was my width measurement. This square cut will allow you to make the corner with your fabric.
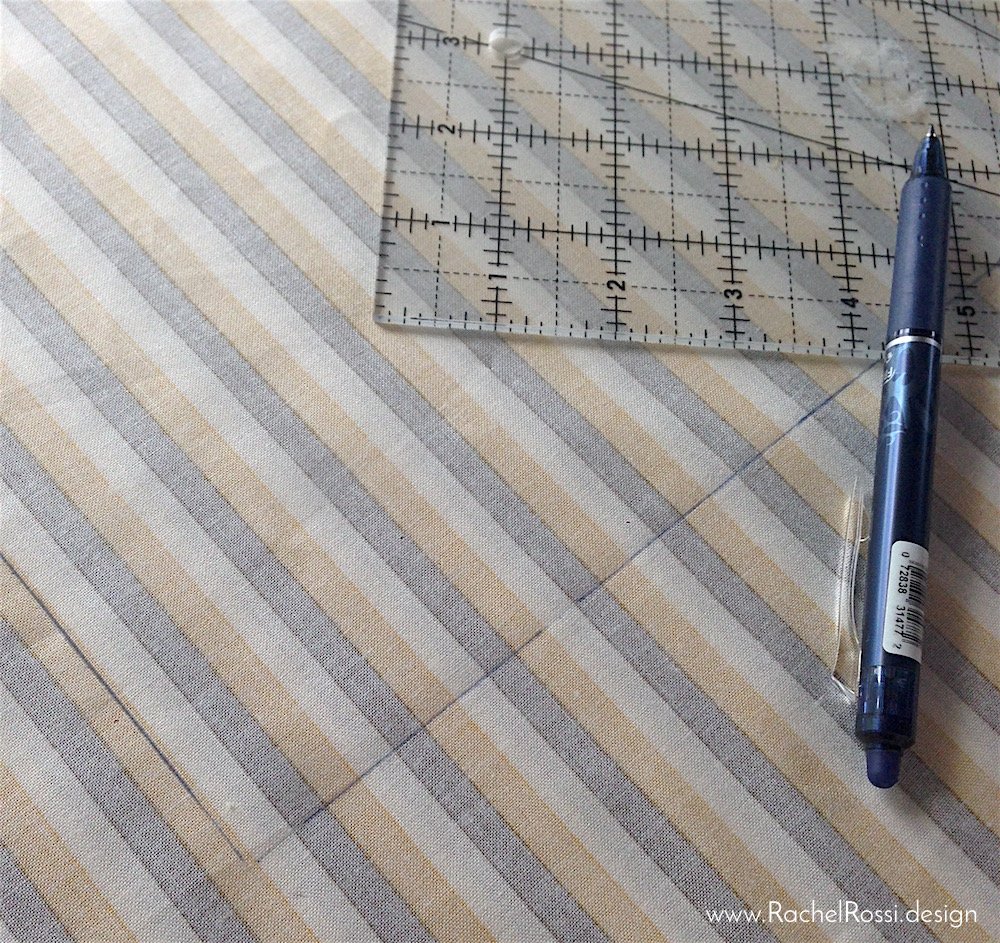
After cutting out your pieces, make sure to iron all of the wrinkles out!
Gluing Fabric into the Cabinet
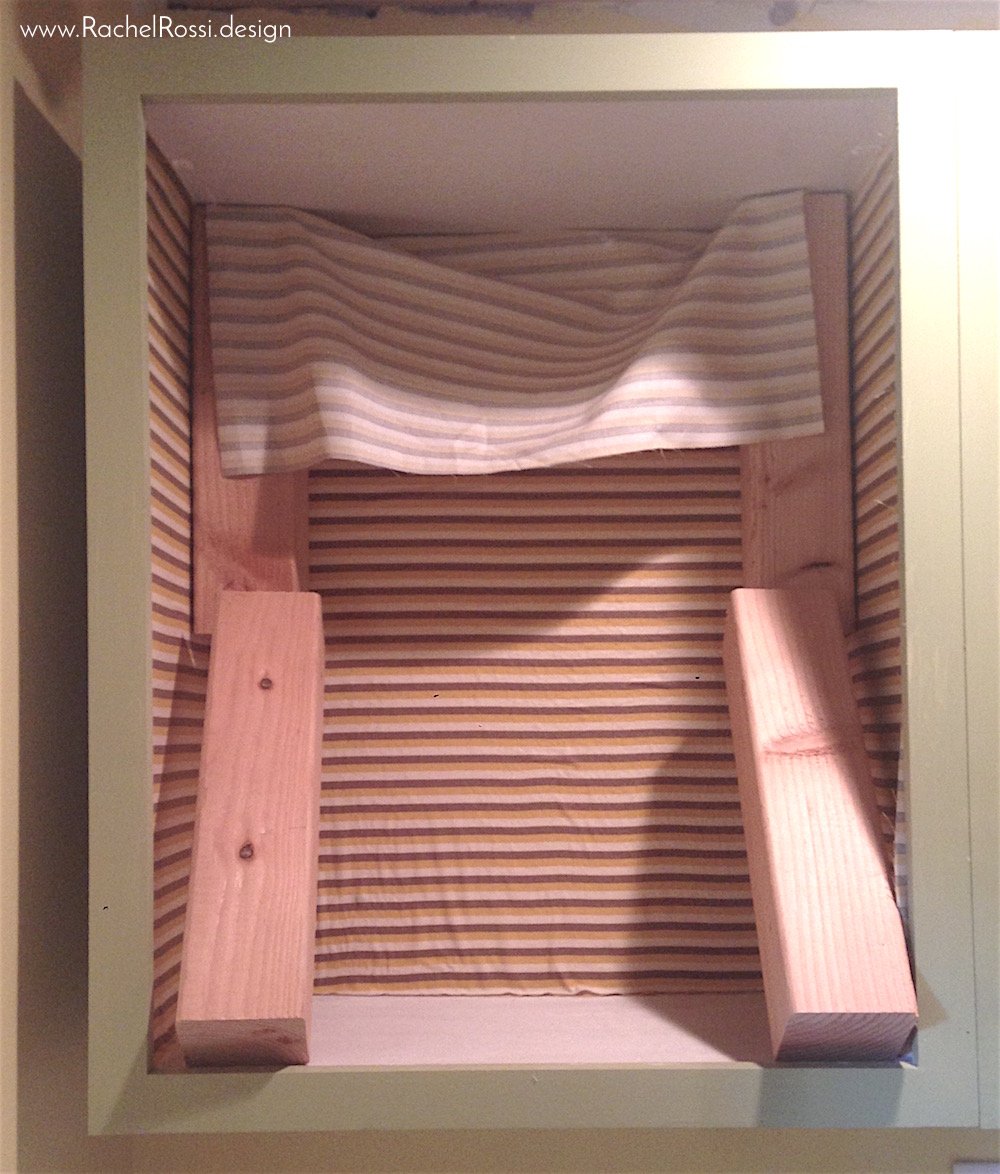
After a few tries and some unruly fabric (and gravity) I found the best way to work the fabric into the cabinet! Starting on the left side, brush lots of glue into all the corners, sides and put a good coat onto the entire left side surface. Starting at the top, line up your first corner, smooth the fabric down all the way to the bottom. This will make sure that your fabric is straight (which especially matters if you’re using stripes). From there, use the same technique on the back side, making sure that everything is smoothed out as you go. Use an old credit card to get any bubbles out. Lastly, work your way around the corner and cover the right side. There might be some extra, but just leave that alone for now.
You might be noticing that things are starting to sag at the top—never fear, mine did the same thing! Go ahead an rig something up (like I did below) to make sure that the top edge stays up until its dry. Make sure to flatten out every and any bubbles that you see!
Now that the sides and back are dry, we can finish up the top. The reason for waiting is because there’s too much weight for the fabric to hold its entire self up while it dries. The back now helps in that effort! Go ahead and cover the entire top section with Mod Podge and smooth out the top, starting in the middle. If you’ve got excess fabric, go ahead and fold it underneath itself for a crisp, smooth edge.
The Final Coat
Once everything has dried and is in place, use your Mod Podge to create a seal over the fabric. Use your brush and drag it across the fabric (don’t worry—it dries clear!). Do this to any fabric that is showing.

The Final Touches
Now it’s time to add shelving! Carefully pre-drill the holes for the cabinet pegs and install them as you like! After that, load the cabinet up, snap some pictures, and show them off in the comments below!
Enjoy reading this post? To make sure you don’t miss a thing, follow me on Pinterest, Facebook, and Instagram and sign up for an email subscription to my blog.