

We’ve all been there—you get to the end of a long sewing day, workshop, or guild project. You’ve laid out all your blocks perfectly, and despite your best efforts not to be a Chatty Cathy, your quilt is still in pieces. You try your best to stack and label them, but we all know that your beautifully organized piles won’t stay that way for long. What to do?
I’ve got a great solution and want to share it with you! It’s been a game changer for me during our basement reno: We are putting the finishing touches on my basement studio while I’m also working in it. I’m eyeing up a blank wall for my design wall, but due to dirty building materials and other things to finish up first, it’s not been hung yet. I’ve found a great solution in my portable design wall though!

Here’s something special I’ve been working on that was all about the layout…I was not about to re-lay it out every time I wanted to work on it!
How to Make a Portable Design Wall
What You’ll Need
- 1 piece of flannel, slightly larger than your project (affiliate link)
- Alternatively, find a flannel-backed tablecloth!
That’s it—I kid you not!
How to Make It
OK, using headings in this post is kind of a joke, but I wanted to share this simple solution with you and for you to see how INCREDIBLY SIMPLE it is!
All you’ve got to do is lay your flannel on a flat surface (I usually end up on the floor), with the right side facing up. Then place your quilt blocks on top. When you’re ready to pack things up, just fold the largest edge over your first few rows of blocks.
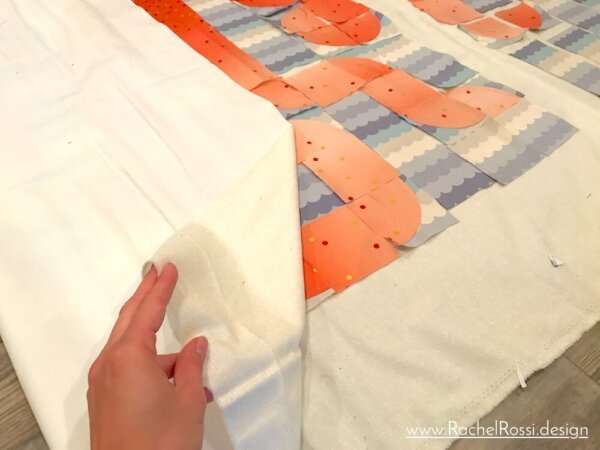
Then carefully roll up the flannel.
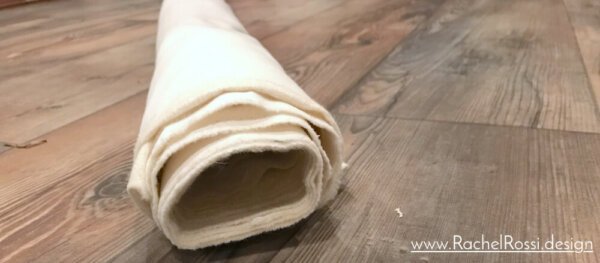
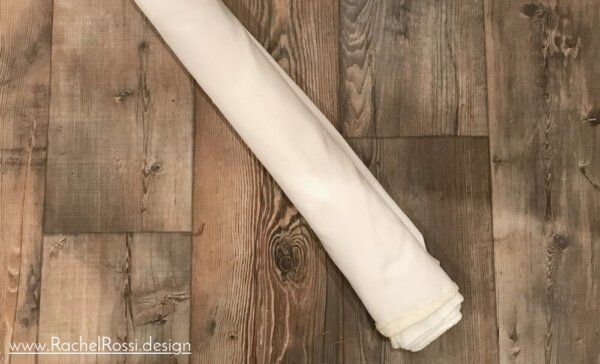
That’s it! The fabric sticks to the flannel, so it’s not going anywhere. When you get home or are ready to start working on it again, simply unroll and get sewing!

I hope you’ve enjoyed this tidbit, if you’ve got nifty tips like this to share, make sure to drop me a message and I’ll share it too!
Enjoy reading this post? To make sure you don’t miss a thing, follow me on Pinterest, Facebook, and Instagram and sign up for an email subscription to my blog.
You Might Also Like

I buy a flannal backed plastic tablecloth to use as my design wall. the blocks stick to the flannal. Roll it up and they stay in p;ace.
That’s a great option too Anna, thanks so much for the suggestion!
I love this idea! Thank you. I have used my carpeted floor to lay out my pattern but then I have to number and stack them and put them out again when I go back to the project. This is so good…..I should have already thought of it!
It’s the simplest things that make the biggest difference! Now you know 🙂
HAPPY SEWING!
Another good way to have a portable design wall is to use a flannel-backed picnic tablecloth, using the flannel side to hold fabric and roll uo. Then just attach the tablecloth to the design wall. It can be set up in a table before rolling.
That’s a great idea! It might work even better than the fabric since the top side is a bit more slick! Thanks for sharing!
What a great idea. I usually lay things out on my king size bed but I invariably end up with dog hair all over it or even worse a dog on top of it! I like the idea of bring everything to a guild meeting where there are usually pretty of tables (and input if needed) making it easier to see it, and re-work it and then pack it all up and bring it home!
Thanks for the great idea!
I’m glad you love it! I am excited for our guild’s next “sew day” and hope to use this trick then!
I love this idea. I will hang one in my new sewing room.