


Flipping through the Burpee’s Seed catalog this spring was, as usual, way too inspiring. I flipped over the page and saw among the squashes: Luffa. I did a double-take and realized that not every bathroom sponge has to grow under the sea—I could grow my own Luffa sponges! I quickly added these miracle seeds to my order and anxiously awaited their arrival. A few weeks later, I was planting four tiny seeds into the ground, no idea what I was in for. Little did I know that these vines would take over at least a quarter of my giant garden & flower well into October; I’ve got enough Luffa to keep a small country squeaky clean.
Making your Own Luffa Sponges
If you have also decided to venture into growing Luffa this year, you’re probably in the same boat as me…there’s enough Luffa to go around! I’ve got big plans for my Luffa and Christmas (see my Luffa Christmas Gift post here!) but don’t be too anxious to give away every sponge! These sponges are fantastic dish scrubbers, shower cleaners, and from what I hear, they are amazing on windows. Make sure to stock up your own closet before giving away every bit of Luffa. But before you go scrubbing down your dog with them, there’s a few steps to take to prepare them for sponge-hood.

Preparing Luffa to Use as a Sponge
To get from what looks like a gourd to an exfoliating sponge, you’ll need to let your Luffa dry out. If you’ve got enough time in the summer, let them turn brown on the vine, and then pick them. If the first frost is quickly approaching, snip the gourds and let them dry out from the safety of your home. Once the skin turns yellow, you’ll easily be able to peel it off, revealing your sponge inside! If you peel them while they are yellow, it’s going to be an ooey-gooey experience, but it’s much less painful than if you wait until they are totally brown. Either option works just fine, just make sure to check on the gourds while they dry to ensure that they aren’t getting moldy.

Shake out the seeds (this is a step better saved for a warm day outside). Make sure to save some for next year’s crop!
Now, use a serrated knife and cut your Luffa into different shapes and sizes. I just sliced mine for a natural luffa look, but you can cut them into sheets for big jobs or for sewing onto the back of a washcloth! There’s lots of different ways to cut the Luffa for different jobs—feel free to experiment, or to just let it hold it’s natural shape.

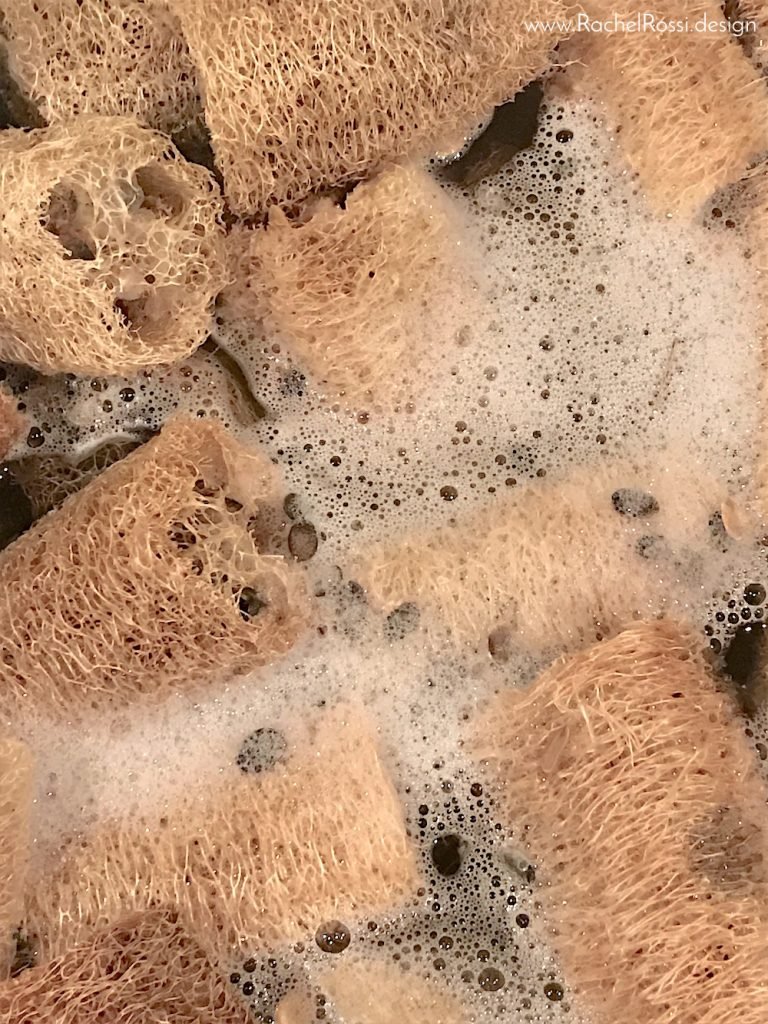
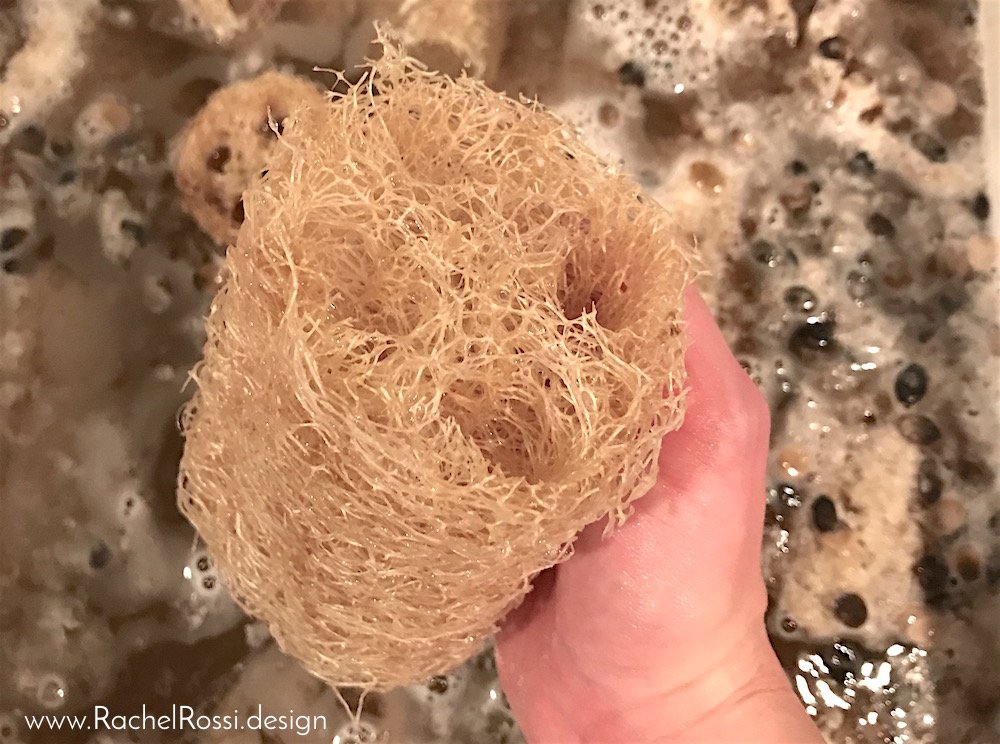
Now it’s time to wash your Luffa. This important step ensures that all the fruit fibers are gone and that there aren’t any insects lurking in there. Soak the sponges in warm soapy water for 1-5 minutes. Then swish and squish them around until you notice the water getting dirty. If there are still seeds in there, get your fingers working and squish all the seeds out.
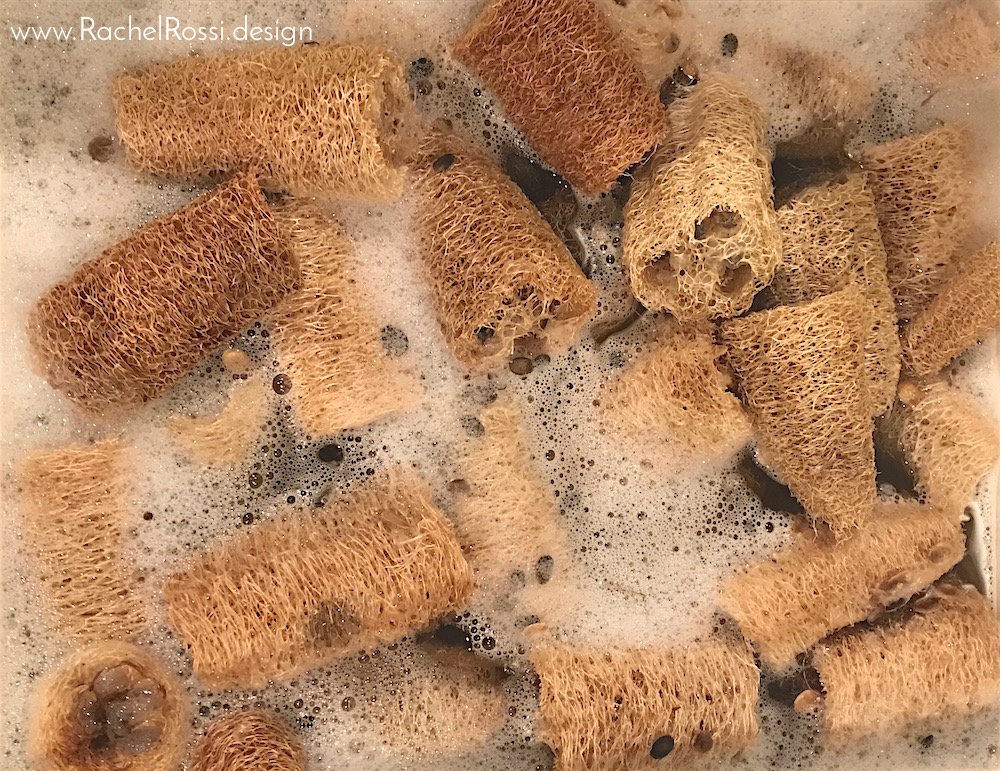
Get clean soapy water and repeat. I used regular dish soap for my first round of soaking and then some Thieves Household Cleaner to tidy them up.

Finally, get clean water without soap and rinse the sponges. Lay out the Luffa to dry.
Tips for Growing Luffa
I learned a few big things about Luffa this year:
- They take FOREVER to sprout. I planted my seeds around the same times as everything else in my garden. And then I waited. And waited. And waited. I thought for sure something had dug them up and snacked on them, but hadn’t seen any holes or disturbance around the seeds, so I waited a little longer…sure enough, little sprouts popped up. So, rule #1, don’t give up on your Luffa.
- Get a Trellis. Or a fence, or a teepee (I had good luck using teepees with my peas and beans this year!). These plants will take over everything! If I could do the year over again, I’d plant two plants, on either side of a wooden teepee structure, and train them to stay only on the teepee. These vines took over 1/4, maybe 1/3, of my garden this year, and my garden isn’t all that small.
- Try and eat a few. My only gardening regret this year (other than not keeping up with the weeds), was that I didn’t try and cook the Luffa! I had looked up how, but never got around to it. Seeing as we’ll have enough Luffa sponges to hand out at our 50th wedding anniversary, I don’t think I’ll be growing them again, so I missed my shot—don’t miss out on trying a new food!
- Don’t be afraid to tame the beast. I often call myself a plant activist, because I simply can’t do it; I can’t pluck those tomato sprouts early in the spring, leaving only one (I eventually bring myself to doing it, but feel like those sprouts deserve a ceremony as they lay to rest in the compost). I can’t thin out the carrots to avoid overcrowding, and I especially can’t trim vines that are consuming half of my garden. Don’t be a plant activist with Luffa—it will take full advantage and take over. It’s really OK to trim them back—I promise.
I had a blast learning about how to grow and use this plant this summer—it’s certainly an experiment that I would suggest you try. I’ve heard great things about the scrubbing power of these plants, so I might will more than likely end up giving in and growing at least one vine next year! How do you like to use your luffa? Have you seen something online that you’d like to give a try? Tell me all about it in the comments below!
Enjoy reading this post? To make sure you don’t miss a thing, follow me on Pinterest, Facebook, and Instagram and sign up for an email subscription to my blog.