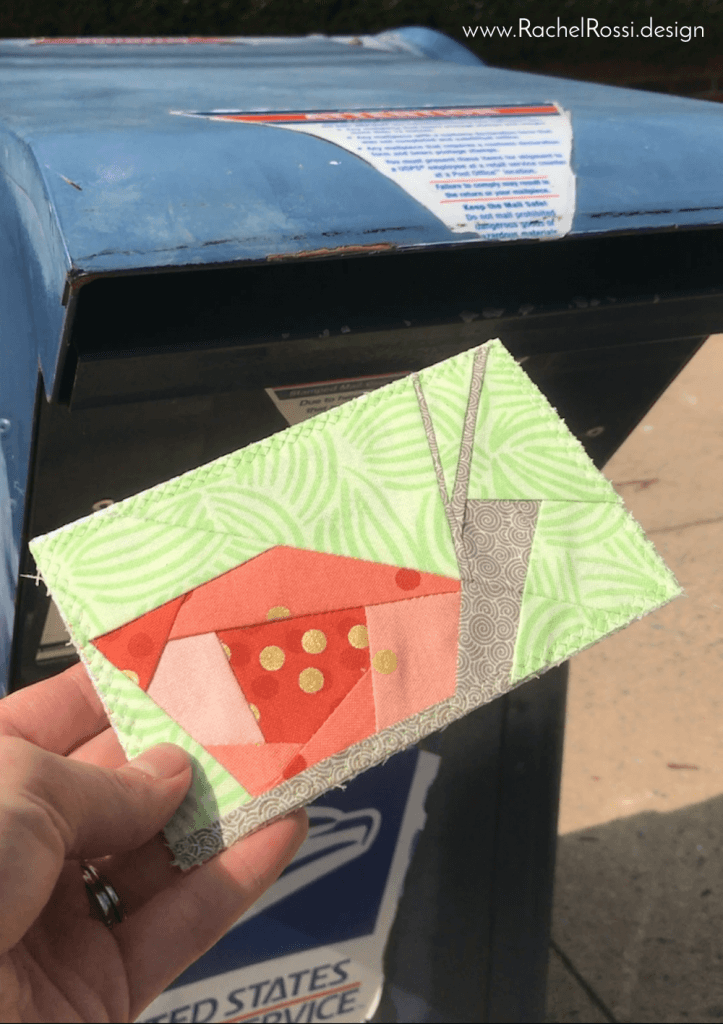
You may have noticed some fun patterns around here lately like Snail Mail and my upcoming pattern: Polaroid Post.
There’s something sweet and old-fashioned about getting a card in the mail these days, the joy that you experience when someone took the time to sit and hand write you a thoughtful note is undeniable!
Now, when someone takes the time to sit down and sew me their thoughts—that means the world! Quilted postcards are a great way to get a quick little project in and show someone you care. The best part? You can create them using fabrics from your scrap pile and odds are that this card won’t get thrown away or stashed in a box…these are center-of-the-refrigerator material!
Creating A Quilted Postcard
I’ll give you the full tutorial in a second, but here’s the ground rules:
- Keep it skinny: the total postcard cannot be thicker than 1/4″ – I learned this the hard way (well, the my fellow guild member did…I went crazy and put binding on mine and she had to pay the additional postage fee upon receipt…it was $0.71, but I still feel a little guilty about that!
- Make sure you use the right stamps: Yes, you’re technically shipping a postcard, but a postcard stamp won’t cover you. You’ll need to use one letter stamp, assuming that you’re under the 1/4″ thickness.
- I haven’t had any issues with the machines eating my postcards, but if you’re worried about it, use a clear envelope so that you can show off your hard work and protect it.
What You’ll Need
- 4×6 piece of Fusible Web (not required, but very helpful) or an Elmer’s Glue Stick
- Fabric/scraps for the front
- 4×6 piece of Pellon interfacing (Ultra Firm)
- 4×6 piece of fabric for the back (white or off white is usually best)
- Embellishments galore! Buttons, ribbons, trim—whatever tickles your fancy.
- 1 letter stamp
- Fine point Sharpie Marker or Micron Pen
Try these Great Postcard Patterns!
-
 Snail Mail Class Kit$29.99
 -
 Polaroid Post$1.00
How to Create a Fabric Post Card
Now that we’ve gotten all the details out of the way, let’s make this thing! First, decide what you’d like the front to look like. You can download my Snail Mail pattern or go with your own pattern. I’ve found Foundation Paper Piecing goes really quickly and looks really sharp on these post cards, but you can do any technique you like, even embroidery!

The only rules with the design are to make it finish at 4″ x 6.” If you’re planning on embellishing, only make the piecing for now, we’ll add the bling later.
Once you’ve gotten your post card front made, use Elmer’s Glue (or basting spray) to hold it to your piece of Pellon. Quilt or embellish as desired. A few simple stitches hold things together nicely, no need to go crazy (unless you want to, of course!)

And yes, you may now add all manner of bling: buttons, confetti, trim…the world is your oyster.
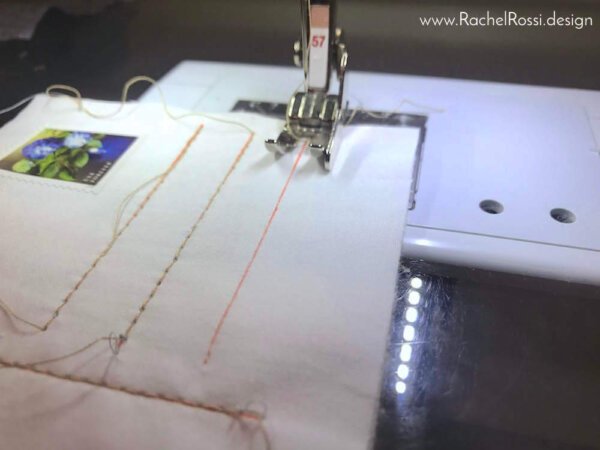
Let’s set that aside for now and get to work on the back. I like to find the center and stitch a line down, rather than drawing it…it just feels right for a quilted post card. To do this, simply layer a piece of interfacing on the wrong side of your postcard back. Use a erasable fabric marker to draw a line down the center and stitch along there. I also stitched a sweet little stamp on, just to make sure it arrived safely (although, I think I’m the only one who does this, stamps seem to stick well without stitching!).
Now that both sides of your postcard are ready, it’s time to finish off the edges! As I mentioned earlier, I lost my mind and actually bound the edges…that just cost me more time and my recipient more money. If you go this route, just be sure to have the postmaster weigh it and charge you accordingly before you send.
The simplest way to finish your fabric post card edges is to fuse or glue the front and back together, and simply zig zag the edges. Serging the edges is also gives a really nice look. Alternatively, you could play with many of the decorative stitches available on your machine.

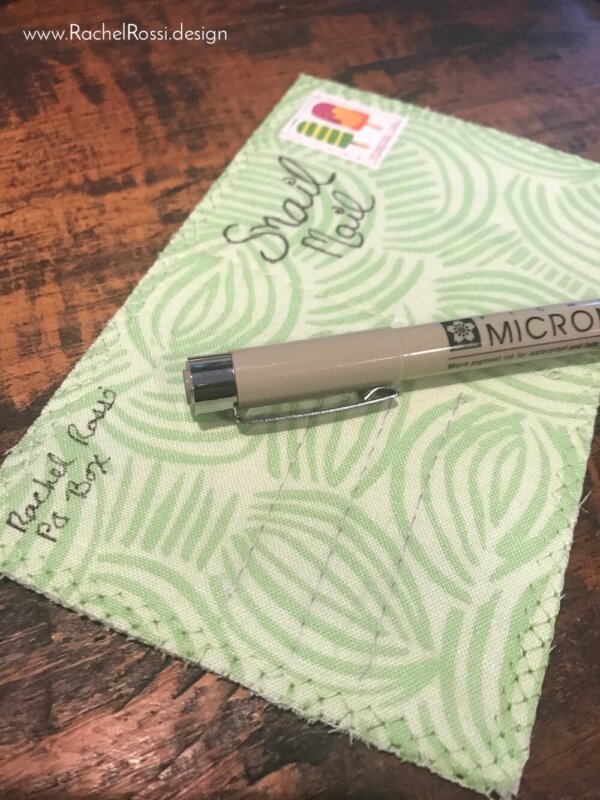
Now all that’s left is for you to write in a witty little saying or encouragement for your friend! I’m fairly convinced that I’m going to start making these silly postcards more often, it really gets me giddy and is such a thoughtful gesture for special friends and family members. I also love that while cards typically get thrown away, this postcard is something that will be saved, hung on the wall, or tucked away with other precious treasures.
I’d love to see what you come up with! Make sure to post your makes on my Facebook page or tag me on Instagram and use #snailmailpostcard
And don’t forget to download your favorite Postcard Quilt pattern!
Enjoy reading this post? To make sure you don’t miss a thing, follow me on Pinterest, Facebook, and Instagram and sign up for an email subscription to my blog.