I’ve been to Ikea, I’ve been to Lowe’s, Home Depot, Amazon, and searched to the ends of the World Wide Web. There’s no such thing as cheap shelving and something that is as wonderful as what I had imagined in my head. Looks like it’s time for another helpful tutorial! Today I’m going to show you how I got shelving that is 10 times better than what I found in-store and cost about half of the price!
Note: Some of the links below may be affiliate links. This means that when you click on a link and purchase from that page, I will receive a small commission. This is what allows me to provide you with fresh and free content every week! I assure you that I only link to products that I use and love. Thank you for your support!
Cutting 12″ Boards
There are a few options with cutting down your shelves. The first option is for those of you who might not have a chop saw or a neighbor/family/church member with one. Never fear—custom shelves can still be yours! Home improvement stores often will make cuts for you for as little as 25 cents per cut!
If you have a chop saw with at least a 10″ blade, you’ll be able to cut these boards, and if you’re wondering how to cut 12″ boards with a blade that is smaller than 12″ I’ll be happy to show you below!
Supply List
- Pine Boards (typically 12″ wide)
- Painter’s Tape
- Safety Glasses
- Ear Plugs
- Tape Measure
- Chop Saw
Measure and Tape
Begin by measuring the length that you want your shelves to be. Then, use painter’s tape and tape two layers around the board where you measured. This will ensure that there’s no splintering!
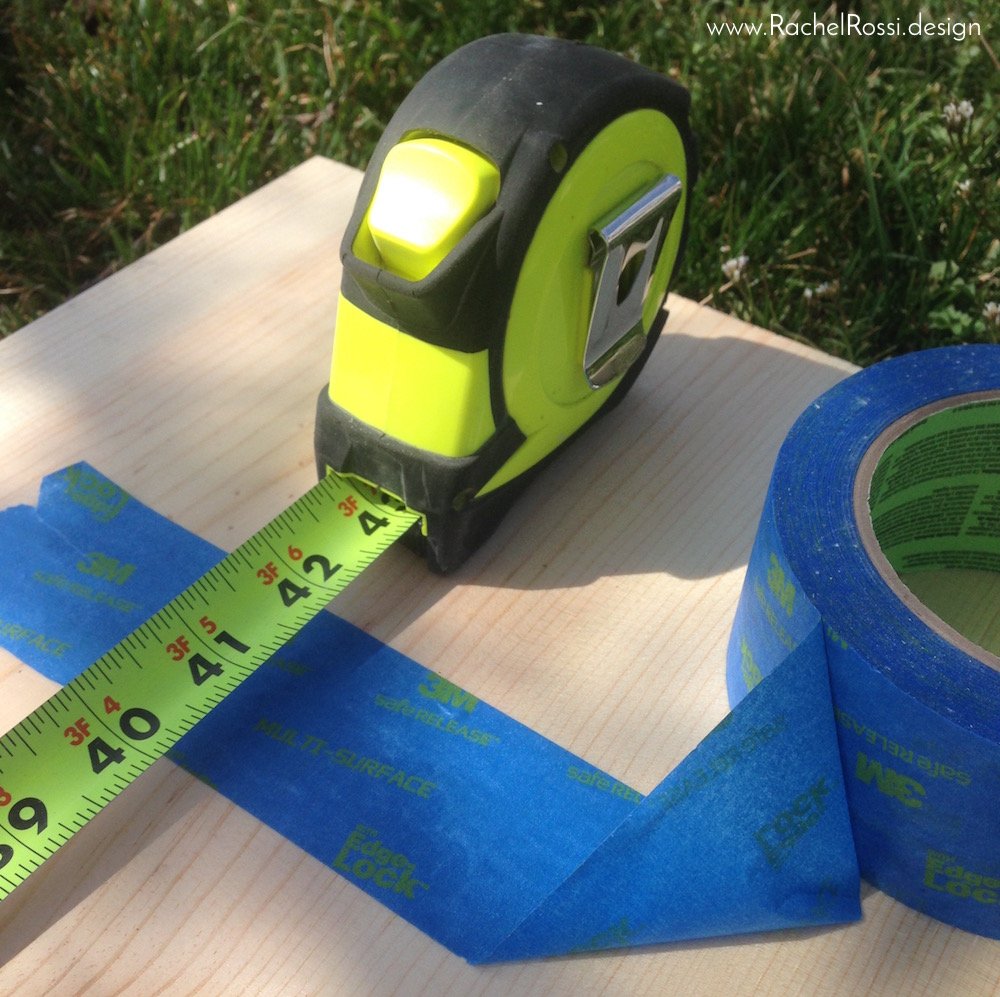
Mark
Measure more carefully this time and mark a straight line across the board so that you know where to make your cut. I suggest doing this on both sides of the board.

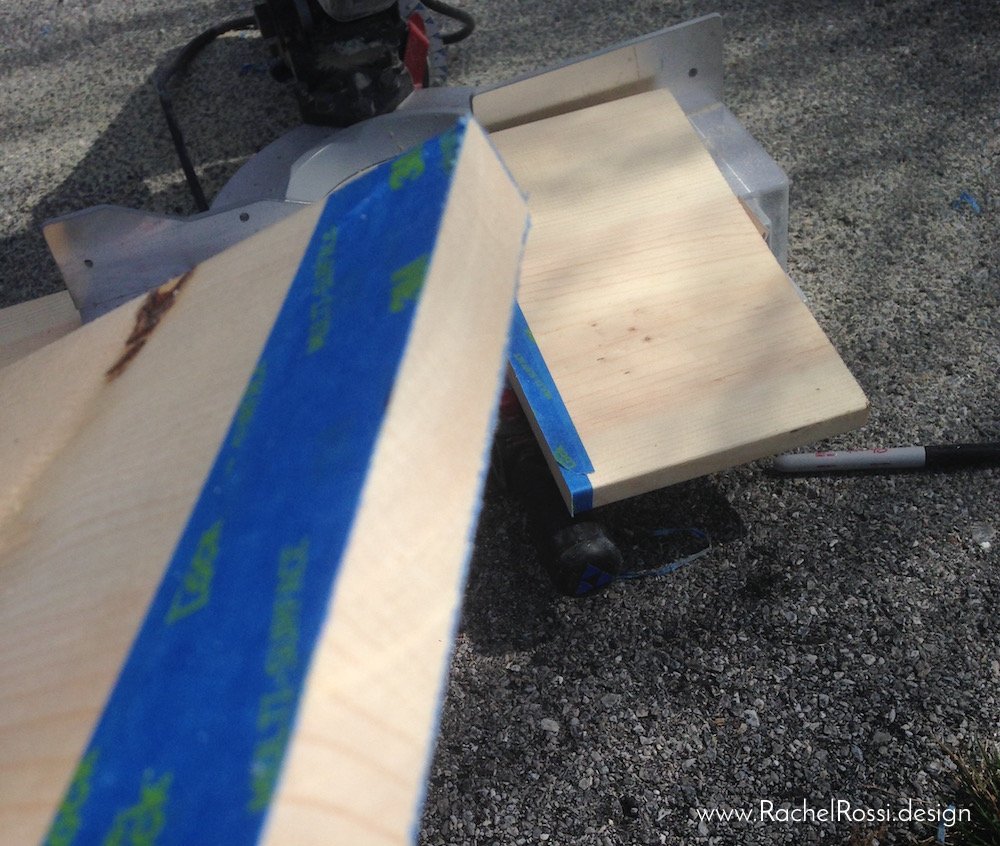
Cut
Carefully line your marks up and make your first cut into the board, it will go through a little more than halfway. While the blade is still spinning, slowly move up out of the board.

Flip your board over and carefully line up the previous cut, mark, and blade. This may take a few cuts to get just right, but you’ll get the hang of it! Make your second cut.
Sand
Sand down your edges to ensure a nice smooth edge.
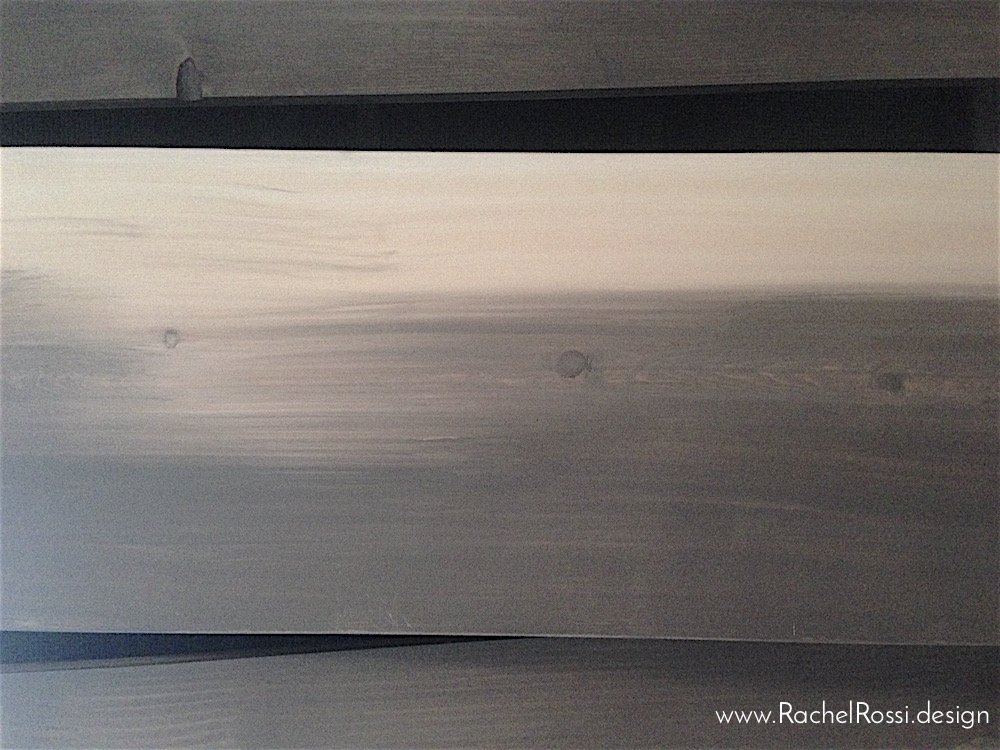
Staining Your Own Shelves
I was looking for an interesting look without spending the money on reclaimed wood. I wanted somethings that looked like reclaimed, sinker or some sort of interesting wood. Using my experience with reclaimed pieces, I started testing out different stains. Here’s what I’ve come up with to create a reclaimed look with water-based stains.
Supply List
- Pine Boards (cut and sanded)
- Grey Water Based Stain
- White Water Based Stain
- 2 Chip Brushes
- Clean White Rags (lint free!)
- 2 mounting brackets per shelf (up to 48″ long)
- Cordless drill and appropriately sized drill bits
Keep in mind that you have two sides on each shelf, so try different patterns and strokes on the first side and use your favorites on the second sides.
Broad Strokes
Start by choosing two colors of water-based stain. I haven’t tried this technique with oil-based stains, but it seems that you could use the same idea with oil-based stains. I wouldn’t suggest mixing oil and water-based stains, as they won’t blend together well.
Now that you’ve chosen your two stain colors, use your chip brush to paint broad strokes on the wood, along the grain. Use your second color to fill in the empty spaces.

Wipe Down
Next you’ll want to use your white rag and drag it along the grain of the wood. I tried to keep a white rag and grey rag separate so that there wouldn’t be too much blending of colors. Feel free to experiment with this part! You’re sure to get some lovely variation by overlapping the stains.
Make sure that you wipe it down so that there is no stain clumping or sitting on top of the wood.
Make sure to get the edges covered!
Let your boards dry for a few hours. Once dry, stain the second side.
Once both sides and all edges have dried, it’s time to seal with a PolyAcrylic or get ready for installation!
Installing Shelves
This part is totally up to you and what interesting wall shelf brackets you can find! I found some simple ones at Lowe’s, but there are lots of great options at Ikea, Amazon, or wherever else you can look! It’s such an exciting process to hang your own shelves, have the exact sizes that you want, and know that it only cost you half of what it could have! Here was my price breakdown for 8 shelves:
My Cost
- 8 – 48″ pine boards = $66.80
- 2 – Minwax Water Based Stains = $21.60
- 16 – Shelf brackets = $79.52
Total = $168
Ikea’s Cost:
- 8 – 46″ shelves = $239.92
- 16 – Shelf Brackets = $ 56
Total = $295.92
What a steal! And I love these shelves way more than the options that I was given! They perfectly match my space and hold all of my craft and sewing supplies in the studio! If you want your fabric stash to look this good, make sure to hop on over to my fabric storage tutorial!

I hope that this was helpful and encouraging to you who just can’t find what you’re looking for. I’d definitely suggest making your own shelves. It’s quick, easy, and you’ll get exactly what you want for far less! Use that extra cash to fill those shelves! If you made your own shelves using this tutorial or have more tips to share with my readers, please tell me and show me in the comments below.
Enjoy reading this post? To make sure you don’t miss a thing, follow me on Pinterest, Facebook, and Instagram and sign up for an email subscription to my blog.
See this, along with other fantastic DIY posts over at the DIY Collective and MadeByYouMondays!!