


 At the beginning of the month I attended my first quilt guild. I know—it sounds crazy…a designer that’s never been to a guild meeting, but hear me out—it didn’t seem like my cup of tea. I now stand corrected; guild meetings are fun for all! I’m super excited to join as a member at the next meeting of the Lancaster Modern Guild! I learned so much at my first demo night, one technique was of particular importance to me: the invisible appliqué machine stitch. This is a technique that isn’t all that new, but I was unaware (and in need) of it until now. I was so inspired that I went home and ripped out a freshly finished appliqué quilt that was just begging for this technique! I’ll require a bit more practice until it’s perfected, but I love the clean edges that it allows
How to Prepare Appliqué for Invisible Machine Stitching
First, trace your appliqué onto freezer paper and cut the template out.
Iron template onto the RIGHT SIDE of the fabric. I know this seems wrong, but just trust me here!

Cut fabric around template, leaving 1/8″ of fabric showing.
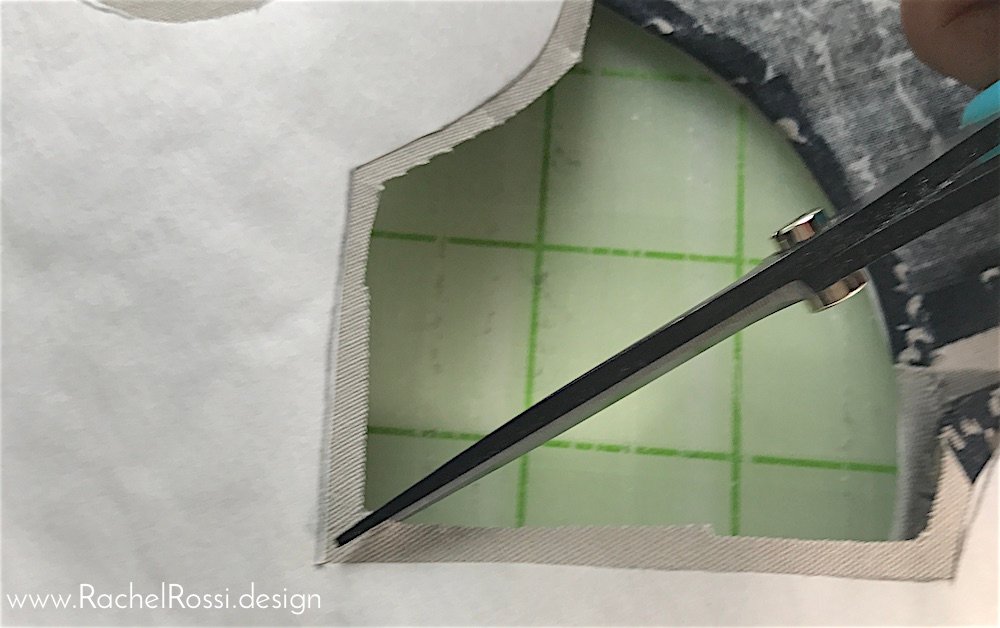
Carefully clip curves, making sure to not cut all the way into your 1/8.”

On the wrong side of the fabric, apply the glue pen around the perimeter of the piece, in small sections at a time, 1/8″ from the edge.

Using a pointed object, gently push the seam allowance onto the back of the piece and onto the glue so that the white freezer paper edge barely shows on all edges.
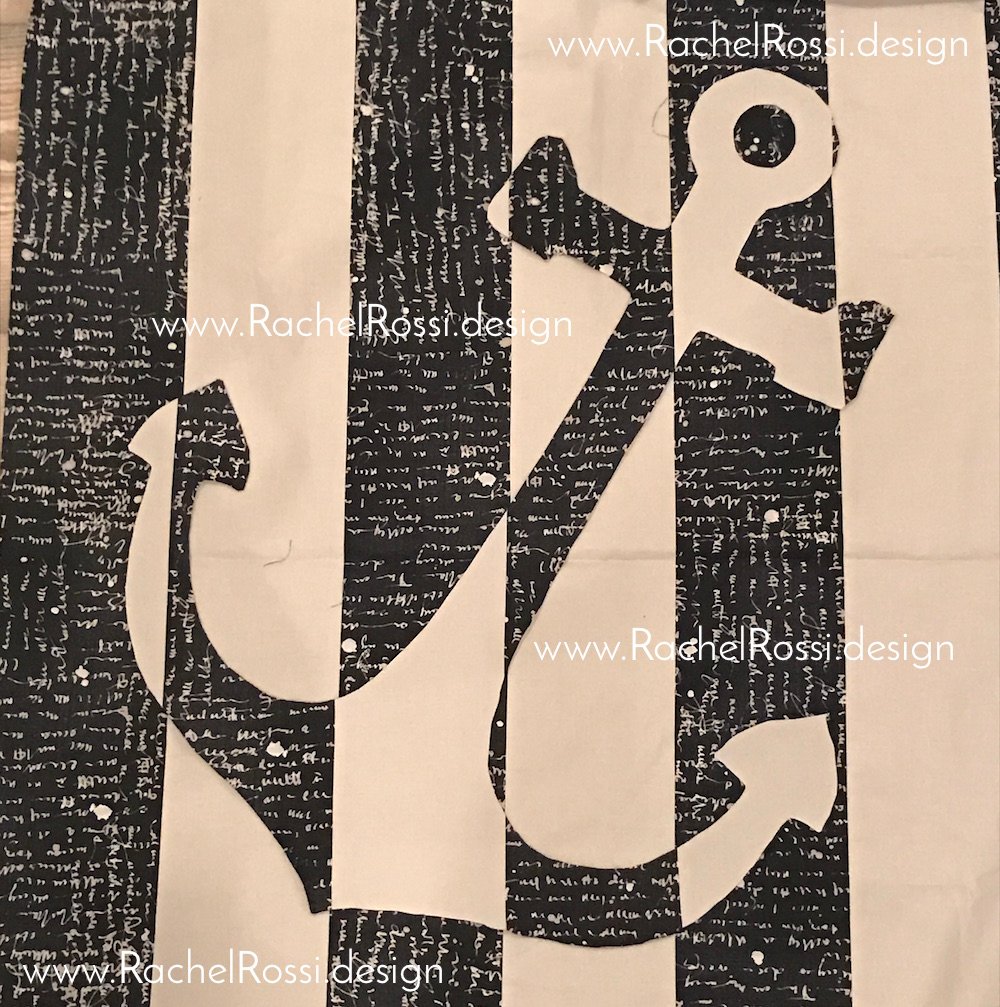
Place the appliqué onto your quilt. Use your glue pen to hold the appliqué in place while sewing. Remove freezer paper.

Notice my lumpy edges in this image: I went back through after peeling away the paper and corrected these problem spots with a little bit of prodding and ironing!
Using a 60/80 Microtex needle and mono-filament thread (a regular bobbin thread is fine), set your machine to blanket stitch. Carefully stitch around the piece. The stitch length should be small and the bite should be narrow (about 1/8″).
There you have it—the invisible stitch method. It’s a bit flatter than using interfacing, but in the near future, I’d like to see if I can combine this with the old-fashioned interfacing method. I feel like the gluing and folding is rather labor-intensive. Maybe I just need to practice a bit more, but we’ll see what I can come up with next!
Until next time, Happy sewing!
Enjoy reading this post? To make sure you don’t miss a thing, follow me on Pinterest, Facebook, and Instagram and sign up for an email subscription to my blog.