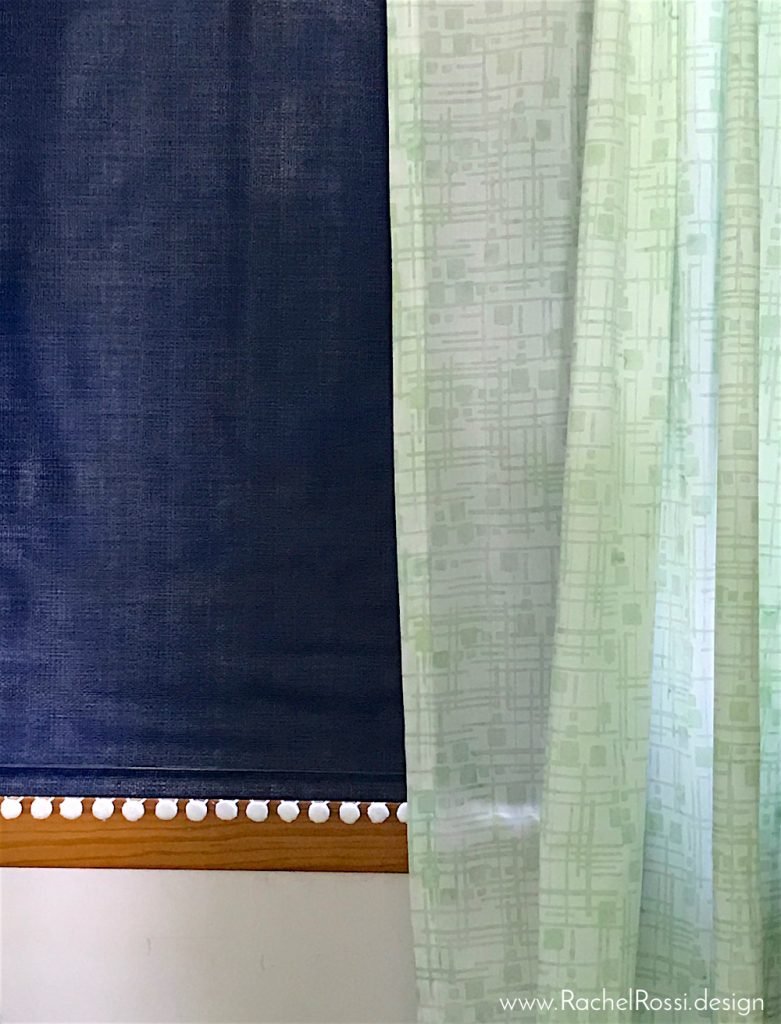
Rolling shades are one of the most cost-effective ways to cover your windows…especially if they came with your house. As we are getting closer to finishing up the nursery, I realized that although I have adorable curtains (check out my curtain tutorial here, if you missed it—they are adorable!), the white vinyl roller shades are not très magnifique. I didn’t want to dump anymore money into this nursery project, so I found a way to update 3 of my window coverings, re-use the shades, and spend about $15! To get the full tutorial on how I updated these tired old shades, read on!
Note: Some of the images and links in the following post might be affiliate links. This means that if you choose to click through a link and make a purchase, I will receive a small commission. This is how I can continue to provide you with great content and tutorials every week, free of charge! Thank you for your support.
What You’ll Need
The supply list isn’t all that long for this roller-shade-redo! This list is assuming you’ve only got one shade to redo, so, if you’ve got 3 shades that you’re working on, multiply by 3.

- Hot glue gun / glue sticks
- Pencil
- Old Roller Shade (wiped or scrubbed clean)
- 3 Cans Vinyl Spray Paint by Rust-Oleum (I found that I needed about 3 coats on each side of the shade, since I was going for a dark navy blue, you might find that you need less for your desired color.)
- Pom-Pom or other fun trim, cut to the width of your shade.
Measure It Out
While your roller shade is still installed on the window, roll it all the way down to the window sill. Make a small mark with your pencil where the roll meets the unrolled portion.

Remove your rolling shade from the brackets (just lift up one side and pull the other side out of the bracket). Unroll another 6 inches and make a large pencil mark on both sides. You’ll want to spray your color up to this mark, so that what you see on the roll is an even color.

It’s Time to Paint!
Set up your painting area outside with a drop cloth or newspaper. Make sure it’s not too windy or dusty outside or you’ll get very frustrated very quickly! Unroll your shade so that you can spray from the bottom of the shade to the large pencil mark all at once.
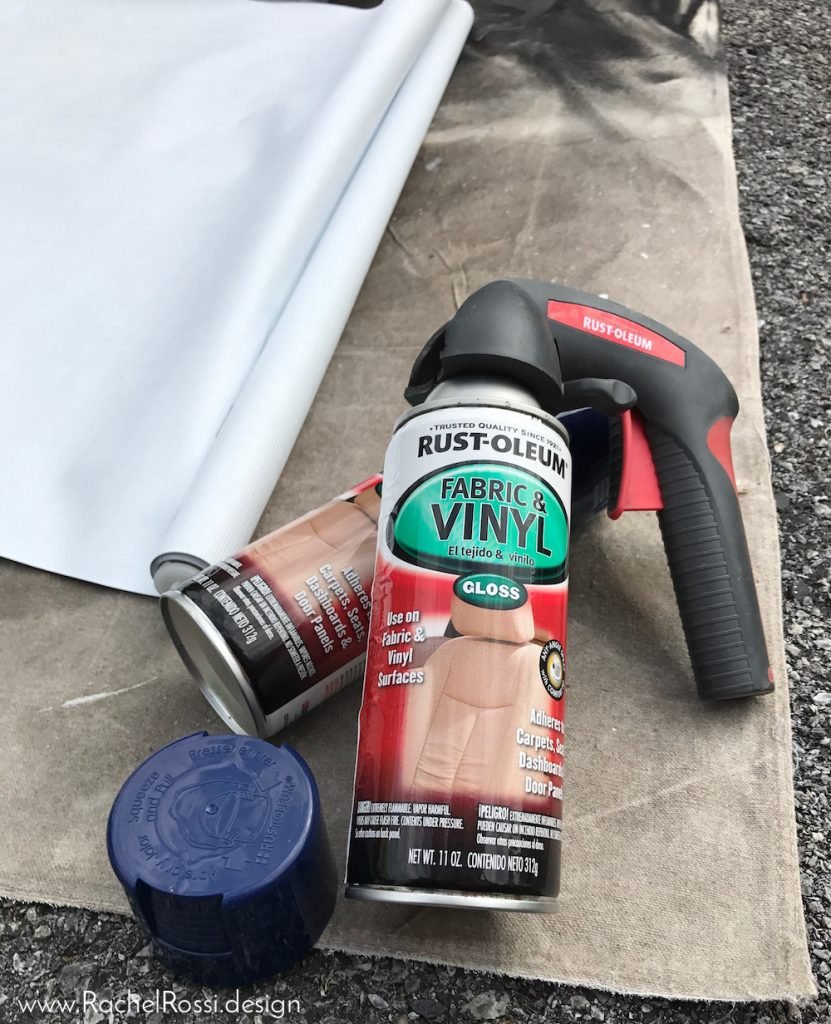

Shake your spray can according to the directions. Attach your Rust-Oleum Spray Paint Grip, if you’ve got one! These are the best for tired fingers, and help me to get a more even coating when I spray paint.
Now it’s time to spray! Spray paint on an even coat between the bottom of the shade and the large pencil mark you made. You don’t need to cover the whole shade, unless you really want to, this will be the only portion that you’ll see.
It’s really important when spray painting any project, but especially this one, that you keep the spray moving, don’t let it puddle in one area. Even if your first layer looks a little blotchy, it’ll even out with your second (and maybe third) coats.
Let your first coat dry and follow up with a second coat.
Make sure that your second coat is completely dry and turn the shade over. In the same way that you painted the front, paint the back of the shade.
Take a final look over everything—make sure that you don’t need a third coat to even everything out.
Speaking from experience: it’s best to hang your shades up and unroll them in the window for a day before putting the final touches on. Otherwise, you could end up with a tacky, stuck together shade and rip or peel off all that hard work! Take my word for it, the extra day of drying is totally worth it!
The Final Touch
Since finding out that we are having a baby girl, I’ve turned into a complete girly-girl…I really don’t understand why this happened, but suddenly I love everything pink, purple, and frilly…also if it’s got a Pom-Pom, I must have it! So, needless to say, I felt the urge to add Pom-Poms to the bottom of this shade because, why not!?
Once you are 100% sure that both sides of your shade are dry, bring them on inside and heat up your glue gun.
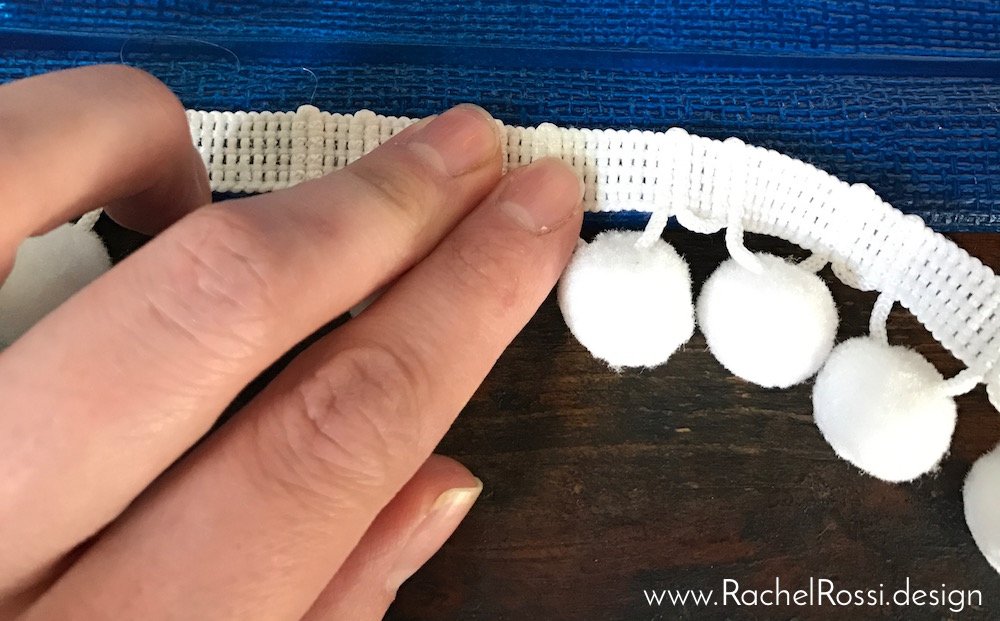
Cut your trim to the width of your shade.


Dab a little bit of hot glue on both ends to ensure that they don’t fray any further.
Turn your shade over so that the back is facing up. Run a small bead of glue across the flat bar that is on the bottom of the shade and press on your trim ribbon.

Repeat until the entire width is covered.
Hang it Up & Show it Off
Now all that’s left to do is hang up this adorable shade and snap a few pictures! Make sure to share it in the comments below, or tag me when you post it to your favorite social media group! You can find me @DesignsbyRR or just use my #PatternByRachelRossi

I can’t wait to see your beautiful creations!
Enjoy reading this post? To make sure you don’t miss a thing, follow me on Pinterest, Facebook, and Instagram and sign up for an email subscription to my blog.
You Might Also Like
