The easy way to make custom quilt labels

I love quilting.
I hate finishing quilts.
I don’t know why, but when that quilt comes back to me, quilted, unbound, and unlabeled, my brain tells me that it’s done.
And finishing it off is a struggle.
But I have found that creating and printing my own quilt labels adds a bit more fun to the final touches required of this quilt-maker!
Note: This post may contain affiliate links. This means that if you choose to click on and purchase through these links I will receive a small commission. This does not add to your cost and is how I’m able to provide you with great free content. Thanks for your support!
Getting Started
Printing your own quilt labels is actually quite easy! Here are a few things that you will need:
- Inkjet Printer
- Freezer Paper
- Fabric (measuring at least 8.5″ x 11″)
- Distilled White Vinegar
Create your Label
First, you’ll need to create your quilt label. I do this on Affinity Designer, but you can do it on a simple program like Microsoft Word or Pages.

I do my best to fit two labels onto the same sheet, this way if there are any hiccups, bleeds, or what have you, I have a second label ready to go!

Preparing Fabric for Printing
Now, before we go shoving our fabric through the printer, we need to get a few things set first! In order to make the fabric firm enough to go through the printer smoothly, we’ll need to adhere it to Freezer Paper.
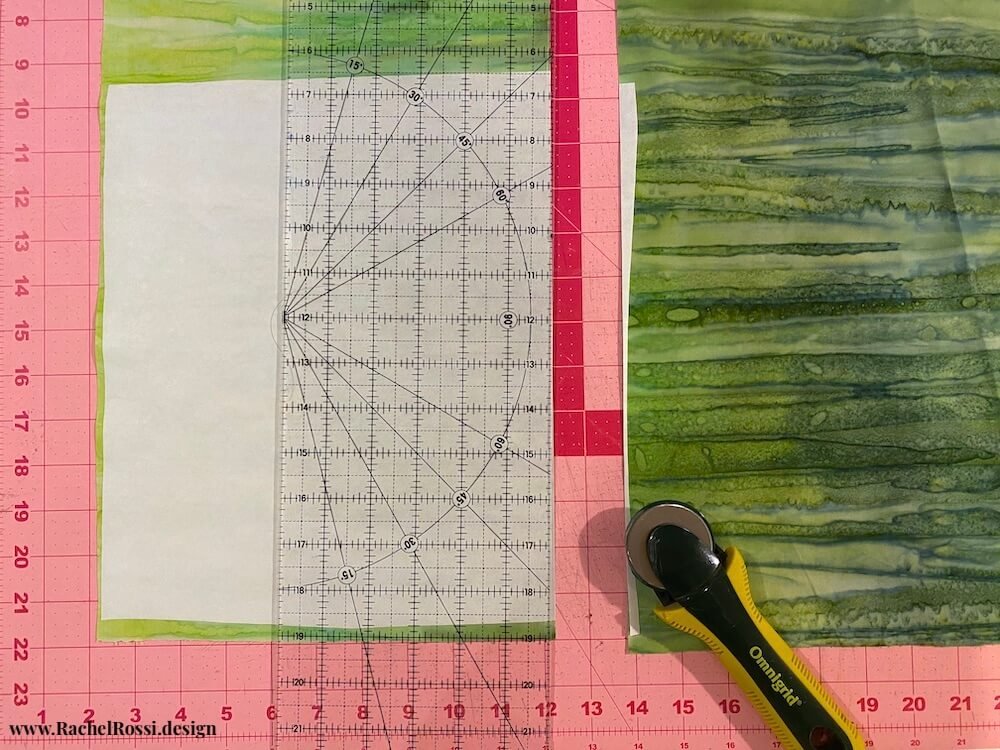
First, loosely cut out a piece of fabric and freezer paper that measure larger than 8.5″ x 11.

Next iron the freezer paper onto the wrong side of your fabric. Use a dry iron for best results!

Now, cut out your fused fabric to measure 8-1/2″ x 11″ – make sure this is right on!

Printing on Fabric
Now it’s time to print!
These steps will vary based on the printer setup that you have. If you’re not quite sure how your paper feeds into your printer or which side it will print on, grab a scrap piece of paper! Label the side that you can see when inserting into the printer and print a test run before inserting your fabric.
Once you’re sure about what side your printer will print on, insert your fabric into the printer feed tray so that it will print on the fabric side.

…then push print!
To make sure that you get the highest quality print, make sure that your print settings are set to “high quality” or “fine printing”
Troubleshooting
When it comes to printing on fabric on a home printer, there are a plethora of things that could and may go wrong! Don’t be surprised by a paper jam or bleeding ink. This process will take a little patience. If you’re having troubles, see some of my tips below (if not, skip to the next section!):
My printer won’t “grab” the fabric
This happens to me often! I get around this by placing the fabric under a stack of printer paper, placing all of them in the feed tray and then just barely sliding back all but the fabric. This helps keep the edges from curling and getting missed by the printer’s feed.
My edges are inky
This is a big reason why I said to print two labels on each sheet. Alternatively, print one label and make sure that it’s centered on the sheet- lots of room to cut out and trim off those messy edges.
I jammed the printer!
Don’t worry- regular paper jams sometimes too. Manually pull the fabric and freezer paper out of the printer. Make sure that you check for threads or fuzz that could have caught inside. If you’re really having troubles getting it all out, check for a secret door on the back of your printer – this gives you much easier accesss.
Making Printer Fabric Permanent
We all want our beautiful quilt label to last as long as possible, so make sure that you don’t skip this step in your excitement!
BEFORE YOU MOVE ON make sure that your ink has dried. Give it at least 10 minutes to dry before getting it wet in the vinegar.
First, trim off the excess fabric on your label(s) and peel the freezer paper off. Make sure to account for seam allowances when you trim!

Find a rimmed baking sheet larger than your quilt label. Pour Distilled White Vinegar in it (just enough to cover the fabric)

Let you label soak for at lest 10 minutes. Let it dry and then iron. This will set the ink and make it waterproof.


You Might Also Enjoy…


Hi Rachel,
You always have the best tutorials! So easy to understand and you never leave questions up in the air. I can’t wait to try these quilt labels. Thank you so much for taking your time to help us fledgling quilters along…
Thank you for your kind words, Laura. I’m so glad that you enjoy these tutorials – I put a lot of work into them, so it’s really nice to hear that they are genuinely helpful. I’d love to see what labels you come up with when you start making them!
Happy sewing 🙂
Thank you so much for this tutorial! I’ve been trying to figure out a way to make my own labels for a long time. This sounds so easy. I can’t wait to try it.
That’s wonderful – I’d love to see what you come up with! Happy creating!