


You know those projects that are supposed to go really quickly…and then they don’t? That was me last week!
As usual, I’ve known about a certain special baby that would be born for about 6 months. I’ve had 6 months to plan, shop, sew, and quilt a beautiful baby quilt.
But no. I chose to wait until this week: 1 week before the baby was due.
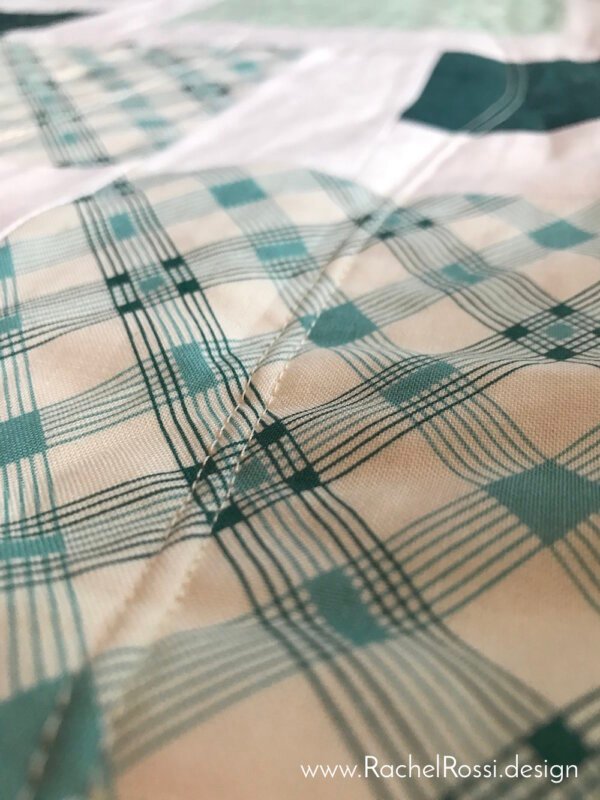
I found the perfect fabric and since I was short on time, I figured I’d use my Merry Mixer pattern. And that part of the plan went smooth as butter—I had the top knocked out in a short afternoon, and I was pleasantly surprised at how the fabrics ended up flowing together! I even bought double of each fabric to add to my stash for a project of my own!
Note: Some links in this post may be affiliate links. This means, if you choose to click on and purchase through these links, I will receive a small commission. This doesn’t change the price of your items at all and is how I can afford to provide you with great content every week, free of charge. Thank you for your support!

But then things got hairy…you know how sometimes projects just never want to be finished? I don’t know if this quilt considered itself not fit for babies or what, but it was trying it’s best to avoid ever getting finished.
To start, I thought I had enough fabric on-hand to make the back. Nope…not quite enough of anything. So, off to the fabric store I went!
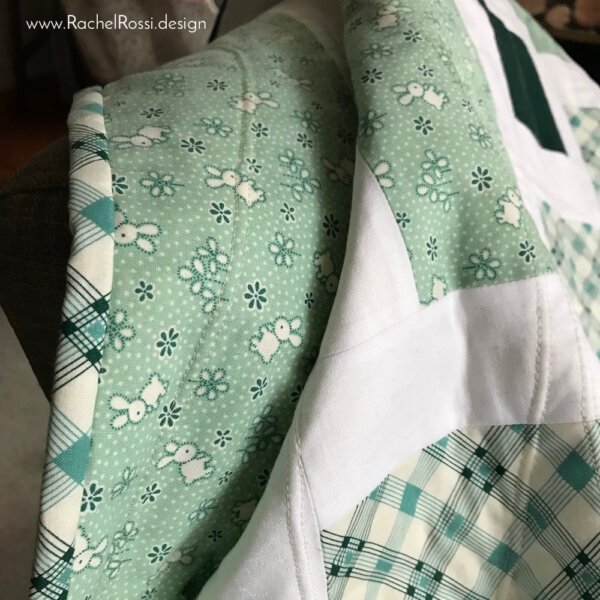
Then we had a bit of trouble finding the right shade of mint (an endless battle for me—I really just need to design a perfect mint fabric line!). After way too long at the fabric store, I chose my pretty little flannel, only to find that there wasn’t enough on the bolt! After some debating, I decided I’d give in and use some fabrics from the font to piece it together.
Then I got home and realized that I own an entire bolt of the exact. same. fabric.
Seriously?!

About ten seconds after realizing that I already had 15 yards of fabric that I had been waiting for days to go get, I realized that amidst my perfect-mint-fabric-hunt I forgot to get batting.
I repeat: seriously?!
At this point, it was hopeless. My family was going to be at my house for our Saturday Easter Celebration in an hour. The next day was Easter Sunday. The baby was due Monday. I forfeited and just concluded that this baby would be in college before she got her baby quilt.
But then I remembered!
I have LOTS of batting that’s ALMOST the right size…perfect for piecing!
And so piece that batting I did. I’ll spare you the details on the quilting, but that was equally frustrating.
I’m proud to say that this quilt is finally finished and ready for baby whenever she decides to show up!

You can get my Merry Mixer pattern in my online shop!
Now that I’ve finished my never-ending monologue, I thought I’d give you a quick tutorial on how to piece your batting and get on with your life.
4 Great Reasons to Piece Your Batting
- Money: Quilting can get really expensive really fast, so using up those batting scraps (that no one will ever see anyway) is a great way to save a few bucks.
- Spring Cleaning: I’m sure that I’m not the only one with a sewing room that looks like a fabric mill just tossed it’s cookies in my house. Any project that allows me to use up scraps and in turn, cleans up the mess that is my studio gets a gold star.
- Save the planet: Not only can we get our homes cleaned up, but using up scraps in projects keeps those scraps from piling up in a landfill somewhere.
- When your in a pinch: This was the kicker for me this time—I really needed to get this quilt done fast. None of the stores were open, but I had a few hours to finish up my quilt. Piecing batting can really save your neck when you’re in a hurry!
How to Piece Quilt Batting
Piecing batting for quilts is very very simple, and the beauty of it is that it looks perfect, and it’s your little secret—no one will ever know the difference because it’s hidden in your quilt sandwich.
Cutting Straight Edges
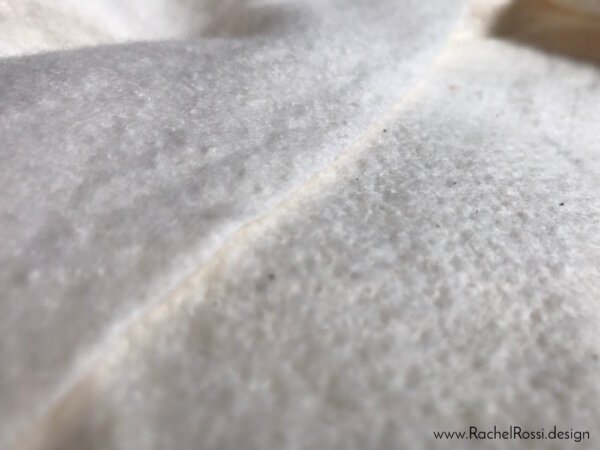
The first step to piecing you batting is to cut a straight edge. Some suggest layering your edges on top of each other and then cutting a single slice through both layers to get the exact same line.

I prefer to just get a straight edge on both pieces of batting and go from there. I always end up trimming the batting at the end anyway. So, first, trim your batting to have a straight edge in whatever way you prefer.
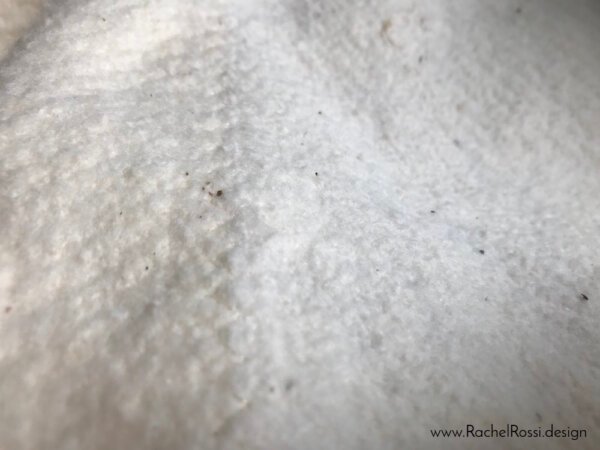
Pimples and dimples
Next, you’re going to get everything set for sewing. You’ll want to make sure that you batting pieces are all facing the same direction. Sometimes it’s a little tricky to tell which way is up, but just try to find which side has “pimples” and which side has “dimples.”
And if you’re wondering which side to have towards the front/back of the quilt, just remember: UP with dimples, DOWN with Pimples. (Or remember that the handle on the “d” goes up and the handle on the “p” goes down).
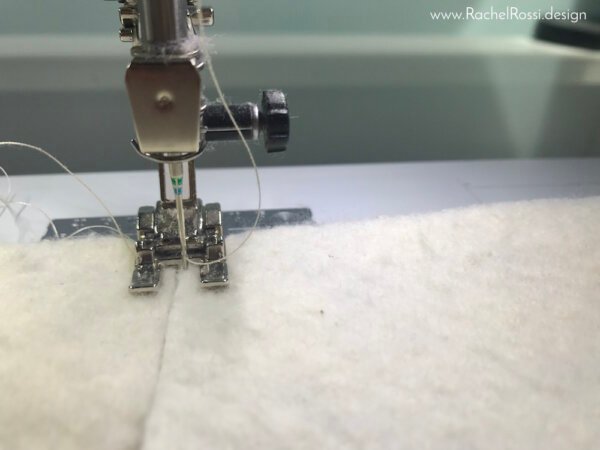
Zig zag
Now that you’ve figured out which side you’re on, it’s time to sew! Set your machine to a Multi-step zig-zag stitch. This just means that your stitch isn’t a back-and-forth stitch, it actually has straight stitched within the zig-zag stitch. This will help to keep things together as you go.
Carefully place both edges of the batting under the presser foot and hold the edges right against each other. As you sew, be sure that your edges are butted up right against each other.

Go!
Once you’ve pieced all of your batting pieces, it’s time to get on with your project and quilt!
You can find a full tutorial on quilting with a double needle on the blog!
Other Ways to Piece Batting

Wasn’t that a breeze? I actually kind of enjoyed it! There is another option that is a bit quicker, but I’ll admit, I haven’t tried it. I’ve heard great things about Heat Press Fusible Batting Tape. You can simply add this to your Amazon cart and add it to your next order. That way, it’s on-hand for when you’re in another batting pinch!
Enjoy reading this post? To make sure you don’t miss a thing, follow me on Pinterest, Facebook, and Instagram and sign up for an email subscription to my blog.

You have a great sense of humor! I snickered all the way through your baby quilt saga😂
haha—I’m so glad you found it funny! Reading back over it is pretty entertaining, although I thought I was going to throw a brick through the window as it was happening! Owning 15 yards of the right fabric the whole time really tells you a lot about the state of my sewing room, doesn’t it? Thanks for reading and thanks for your comment!
Thanks for the info Rachel – everything you had to say about the scraps of everything that pile up is SO true.
One question and one comment.
Question – what length/width do you set your multi stitch zigzag to?
Comment – I have used the Heat Fuse tape and it is very good indeed – does exactly what it says it will.
Hi Margaret,
Thanks so much for commenting! To answer your question, I believe I used something close to 1 for both of my settings, I’m not sure what machine you’re working with, but something between a small and medium setting.
I’ve heard great things about the Heat Fuse, I really should try it–anything to make the process faster, right!?