


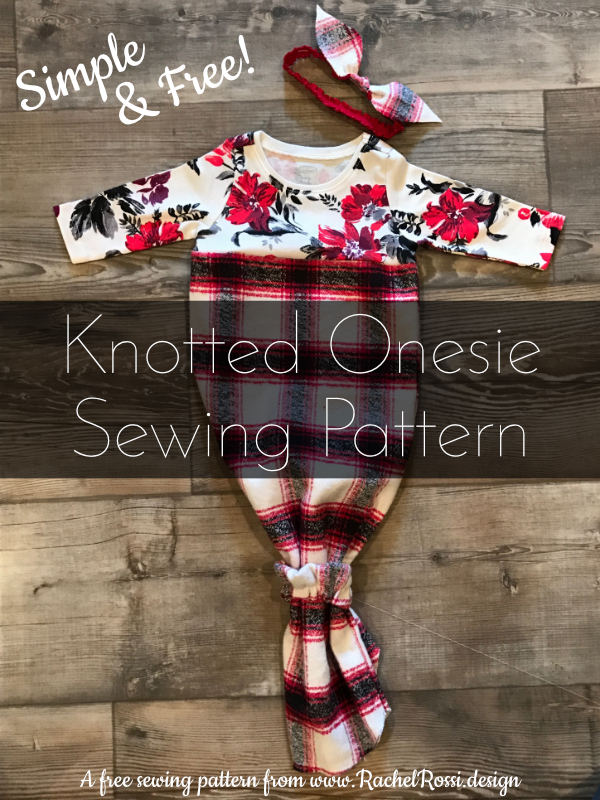
It is always a good day for a free pattern release! With my sweet little baby girl almost here and ready to model all of my teeny tiny creations, it’s an even better day for a free baby pattern release. Today, I’d like to present you with my incredibly simple Knotted Baby Gown sewing pattern. The best part: I’ve also got a great little tutorial on making a matching headband—it really doesn’t get much better than this!
The Stats
The sewing pattern for this knotted baby gown works on sizes newborn-9 months. With a longer skirt, you could go for an even larger size.
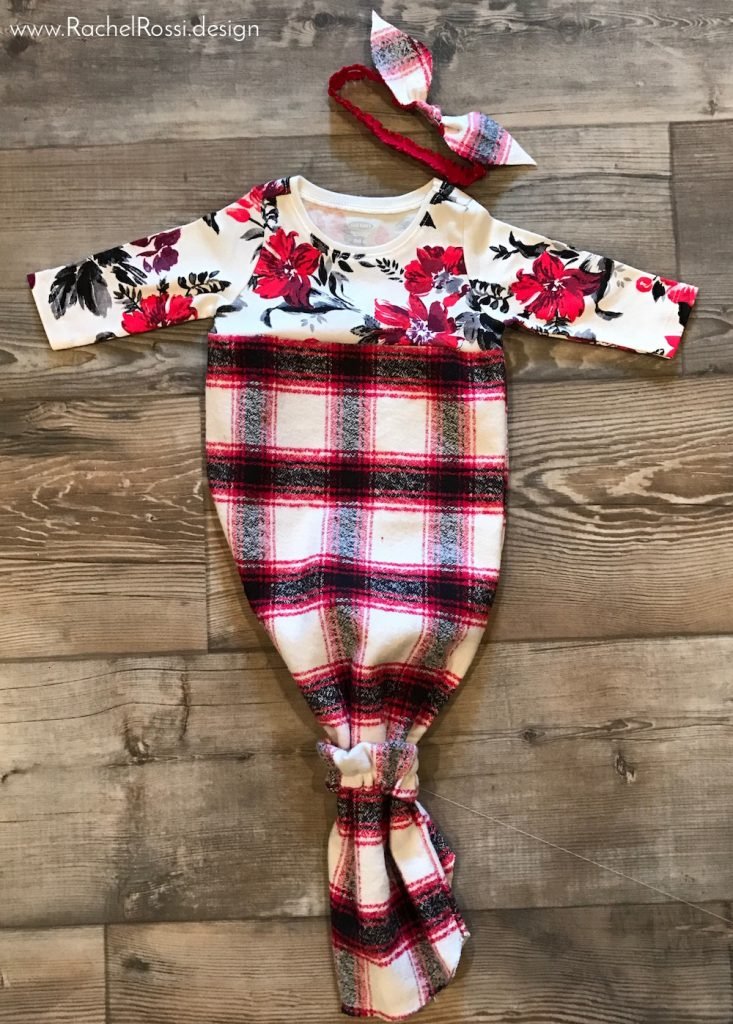
There’s lots of great options with this pattern: I used flannel in one version and left the bottom unfinished (I topstitched the bottom to ensure that the fraying didn’t totally unravel the skirt) and I love the look! You can hem the bottom, skip the elastic, or knot the bottom (like you’re seeing all over Pinterest), or, you can hem the bottom and let the skirt act as a skirt—no knots or bows!
-
 Hover$15.99
 -
 Water’s Edge$14.99
 -
 Teeny Tumbler$8.00
What You’ll Need
The possibilities are endless for this little onesie! Some great fabric choices include flannel (what’s sweeter than a baby wrapped in flannel!?), cotton, terrycloth, minky, knit…the list goes on and on!
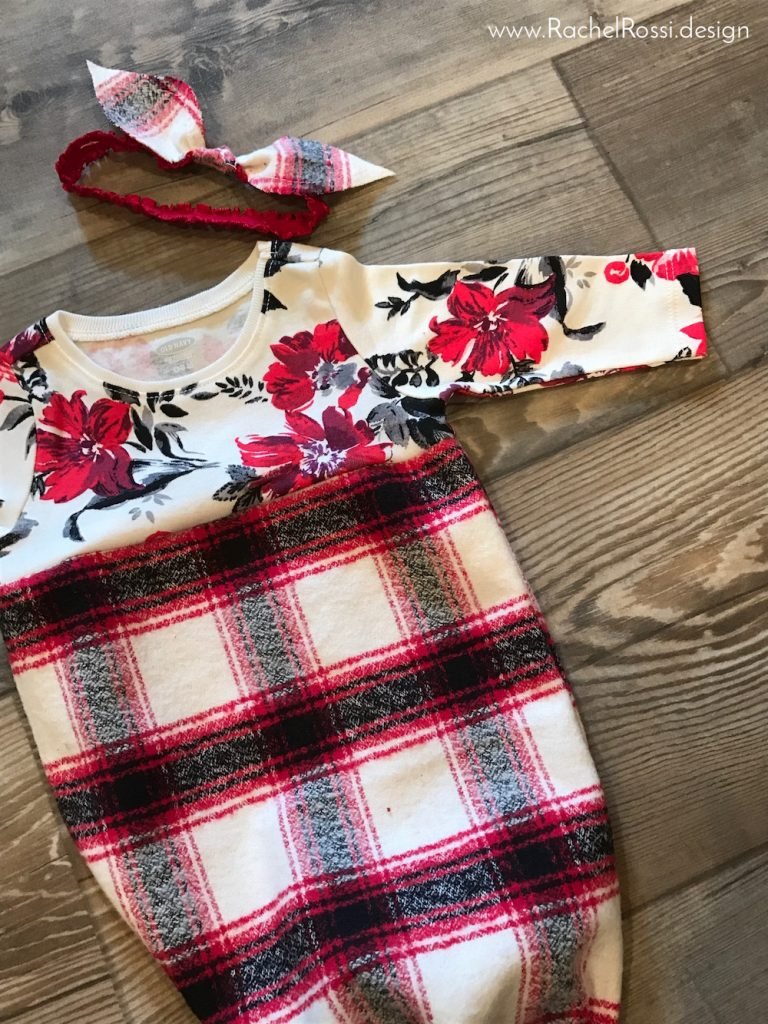
Knotted Baby Onesie
- 3/4 yard fabric (if you plan on making a larger skirt, I’d suggest 1 yard)
- A onesie that you’re willing to cut up (this is a great project if the bottom half of a favorite onesie has seen better days)
- 5″ of 1/2″ – 1″ elastic (you’ve got to have that lying around somewhere!)
- Your FREE pattern (just add to cart and download for $0!)
Matching Headband
- 5/8″ Ruffled elastic
- Scrap Fabric (either from the skirt or the onesie)
Making the Matching Headband
This headband is unbelievably easy—you’re going to be tickled pink at how quickly this goes together!

Start by cutting your ruffled elastic. Depending on the size and age of your baby, use this as a cutting guide:
- Premie: 11-12″
- Newborn: 13″
- 0—1 Years Old: 14″
- 1—6 Years Old: 15″
- Child—Teen: 16.5″
- Adult: 17.5″
Cut your elastic to the correct length. Then, overlap the ends by about 1/2.” Sew across the overlapping pieces to secure into place.
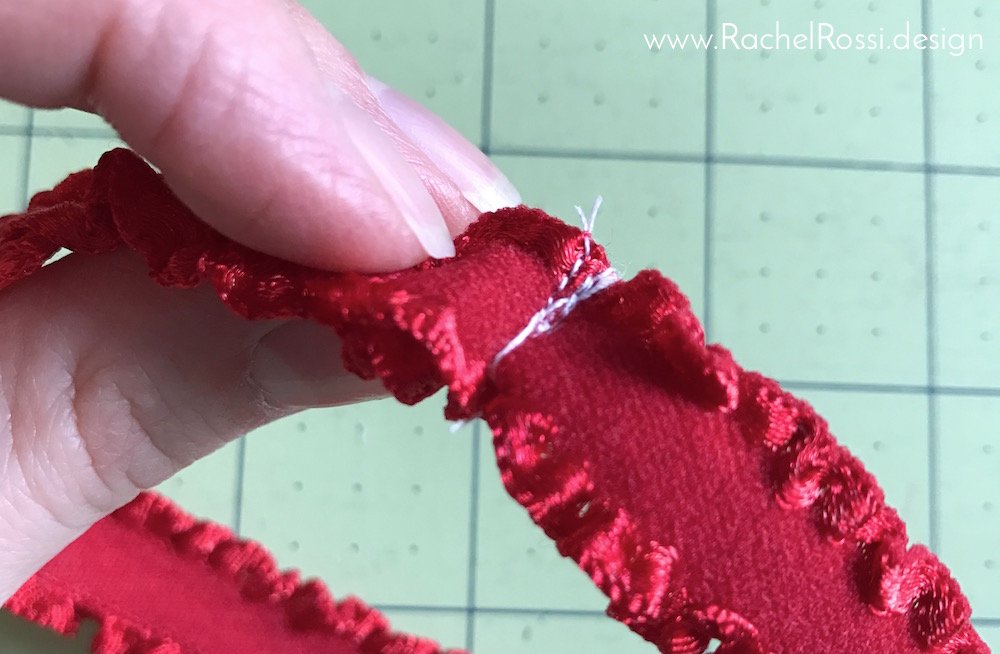
Trim your threads and set aside.
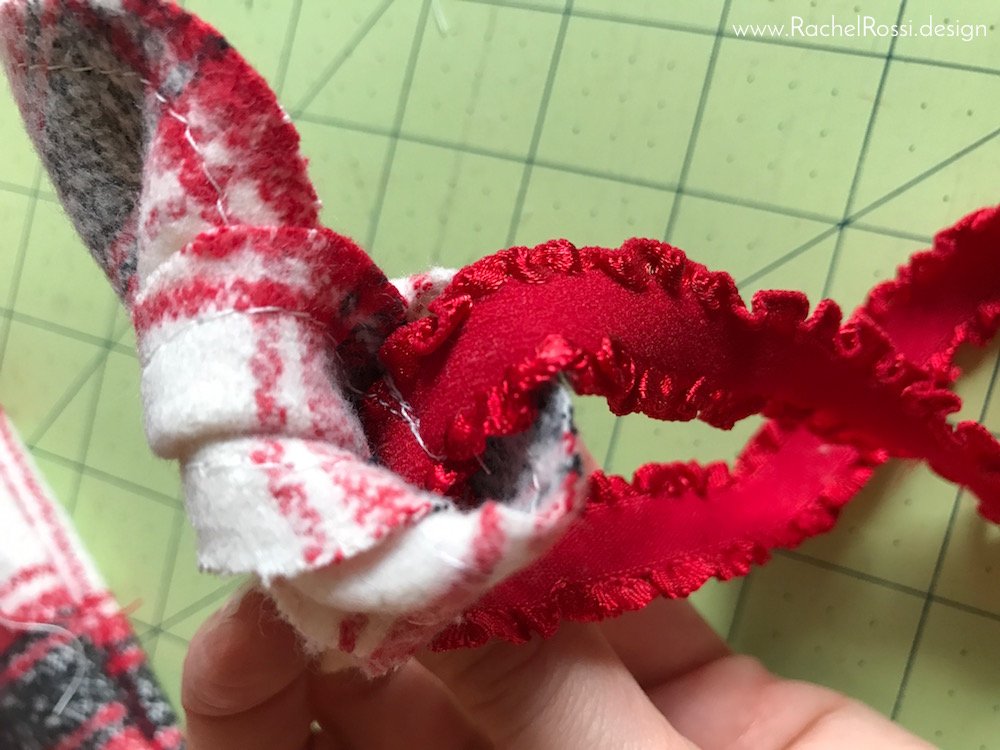
Now it’s time for the bow! Start by printing out my bow template (click here or on the image below to download). Make sure to print this at 100% scale to get the proper size!

Fold your fabric in half, right sides together. Pin the template on top, placing the straight edge on the fold. Cut around the template.

Stitch 1/4″ away from the edge of the bow, the whole way around. This will allow the fabric to fray a little, but not too much!
Place the elastic overlap in the straight part of the bow, loosely tie the bow in a single knot, arranging as you tighten it.

Tighten the bow the entire way, making sure that you hide the overlapping elastic inside. Viola! You’ve got yourself a headband!
When you have your version all made, make sure to show it off in the comments below or in our Facebook group! And don’t forget to use #PatternByRachelRossi when you do!
Enjoy reading this post? To make sure you don’t miss a thing, follow me on Pinterest, Facebook, and Instagram and sign up for an email subscription to my blog.
Cute idea and pattern.
Thank you so much Kay! 🙂