

I recently got a question in the comments section of my post about getting straight cuts on large pieces of fabric. Amanda asked, “When I fold a larger piece of fabric in order to cut it, even though I’ve lined it up and squared it off, when I open the fabric up, sometimes I find the cut is curved. I used a rotary cutter and mat and ruler, but I can not figure out why this happens quite often. What do you think the problem is?”
Note: Some of the links in this post may be affiliate links. That means, should you chose to click on and purchase through these links, I will receive a small commission. This is how I’m able to provide you with great content every week, free of charge!
I thought this was a great question and got to answering her right away. It started getting a bit lengthy, so I thought that I would work on a post with pictures & be more helpful to you and Amanda. So, today I give you some fabric cutting troubleshooting:
Why Does My Fabric Curve When I Cut It?

Let’s start off by saying that cutting can be tricky, especially when your fabric is larger than your cutting mat. I always suggest getting a large mat for quilting, but that’s not always in the budget and a large mat can take up a lot of space! Here’s the most common problems I’ve found:
#6: Press Your Fabrics

Make sure that your fabric is pressed before cutting. Sometimes a ton of teeny wrinkles can really add up. This will also help you avoid stretching your fabrics. (See below)
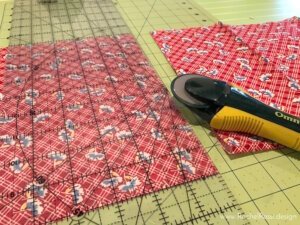
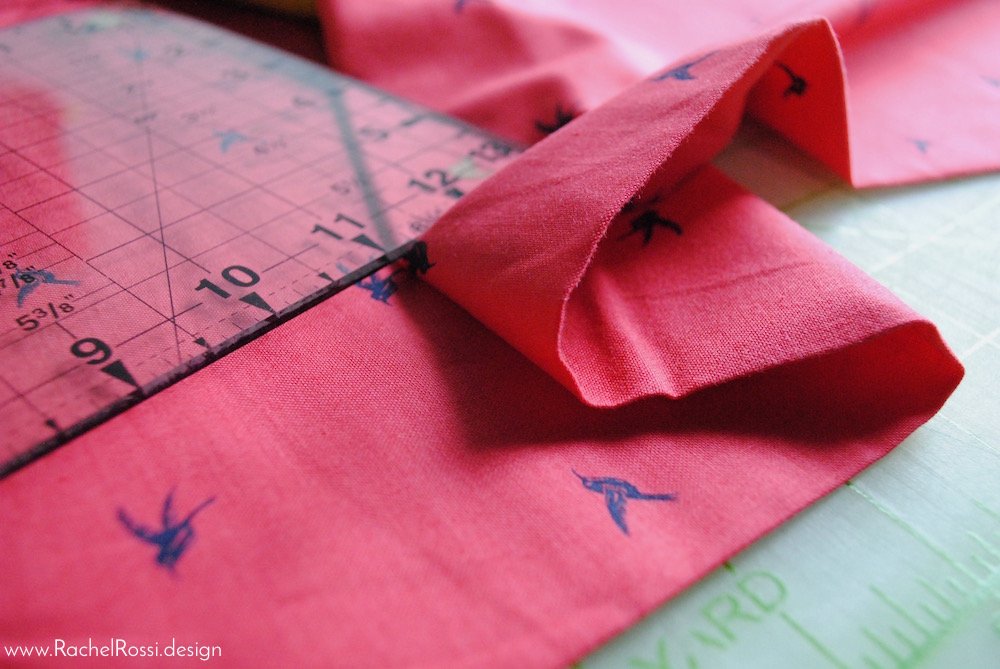
#5: Start With a Straight Edge

Make sure that before cutting your pieces out, that your raw edge is straight. Many fabric stores do not use a rotary cutter and/or they don’t straighten the fabric when the cut it off the bolt. So it’s always important to establish a straight edge before cutting any strips or rectangles from your yardage. You’ll do this by first creating a straight fold, parallel to the selvedge edge. Then using your ruler and mat grid, you’ll cut a straight edge perpendicular to the folded edge (cutting off some of the raw edge). You can find the full details on my post Measure Twice, Cut Once: A Cutting Tutorial for Quilting.
#4: Stay in Line
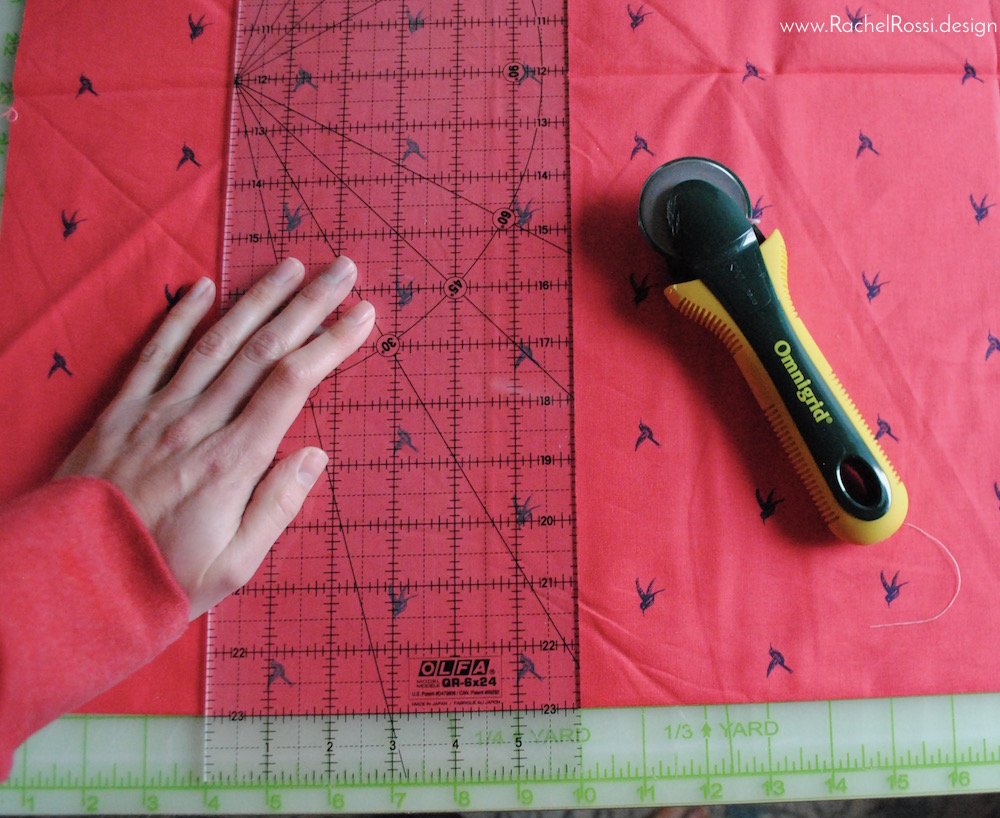
Are you keeping your fabric lined up on the mat *and* the ruler? When you cut, make sure that things are straight on both the mat and ruler. Some people prefer to use the ruler as their guide and some people prefer to use the mat. I prefer to use both! The mat serves as a great guide and the ruler is really more precise as far as what you can see. Always make sure to check both the mat and ruler for straight lines.
#3: Sliding Rulers
This one is a very common problem when cutting: Make sure that your not sliding as you cut. This can be pretty dangerous (if you’re unaware of just how sharp that rotary blade is, be ye warned!) and can really throw off your measurements.

Is the ruler slipping as you cut? I’d say this is the third most common problem when cutting with a rotary cutter and mat. Pick up some small, non-stick feet to put on your ruler in this case. Even a tiny slip can make a huge curve on your cut. These are an easy item to add into your next Amazon order!
#2: Fold As Little As Possible
When you’re cutting fabric, it’s best to avoid folding as much as possible. But often we have to fold because of the limitations of our mats or workspace size. The problem is that when you fold fabric and then cut it any mistakes become exponential. So how to avoid this mistake? Make sure that you’re following the suggestions above and folding as little as possible. This is the number two mistake, and is closely related to the number 1 mistake, so make sure to follow this last rule if nothing else!

If you need help with a large piece of fabric or a small mat, make sure to check out my post on cutting fabric when it’s larger than your cutting mat.
#1: Stop the Stretch!
And here we are at the number 1 mistake that’s giving you curved cuts! Fabric is tough to get straight because it’s made from stretchy threads and is woven (double whammy!), so check that you’re not tugging on it as you fold it for cutting. It’s a problem that sneaks up on you and is hard to avoid. Try and stay conscious of this and gently pressing your fabrics with your hands, rather than tugging on them.
Another sneaky problem with the stretch is that sometimes when fabric is put on the bolt it gets stretched along folded edge. This is something that you might not notice until after you cut out your pieces and then unfold them to find a giant curve in the middle of your cut. This is where pre-washing might come in handy. Because the water and heat forces the cotton to relax, you can start with a clean slate. If you purchase a fabric that looks especially with stretched or warped, I would absolutely suggest pre-washing and pressing before getting started! It could make all the difference in your project.

What common problems do you have when cutting quilt pieces? Make sure to share your solutions in the comments below!
Cut Out A New Project!
Now that you’re up to speed on cutting, try out these new patterns!


Burst is a simple and modern pattern that is a showstopper from any angle! Timber! is our best seller—perfect for kids of all ages! Make sure to check out these, and more, great patterns in my shop.
Related Posts
I’ve got lots of helpful tutorials on my blog, be sure to check them out!

Enjoy reading this post? To make sure you don’t miss a thing, follow me on Pinterest, Facebook, and Instagram and sign up for an email subscription to my blog.

Recommended for this Blog Post

So helpful, thank you!
I’m so glad to hear it! 🙂