
This originally was posted on the Timeless Treasure’s Blog. They are experiencing technical difficulties on their blog at the moment and granted me permission to re-publish this on my blog – enjoy!
I’ve been putting it off long enough! Yes, it’s time for my trusty nasty old ironing board cover to get a fresh look. When I saw the Hive Rules collection by Timeless Treasures, I knew exactly what I was going to do with it!

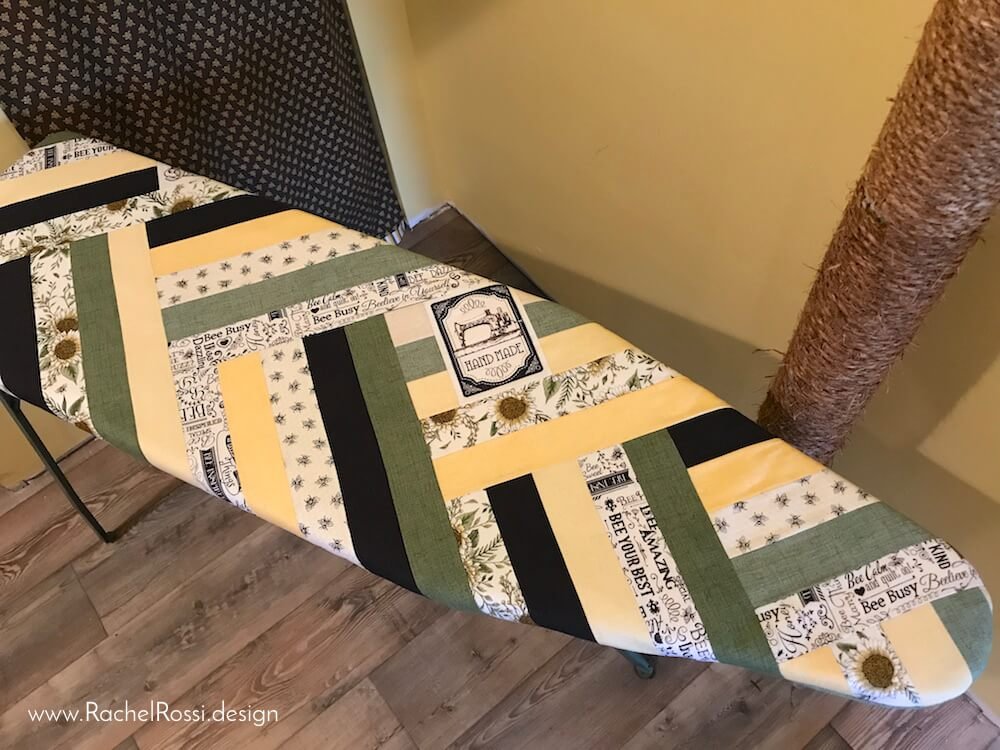
This awesome ironing board is so much fun to create and makes for a much more pleasant experience in the laundry room…I might even like ironing dresses and shirts again!
Supplies and Fabric Requirements

This tutorial is for a standard 15″ wide ironing board, make sure you have similar dimensions before getting started!
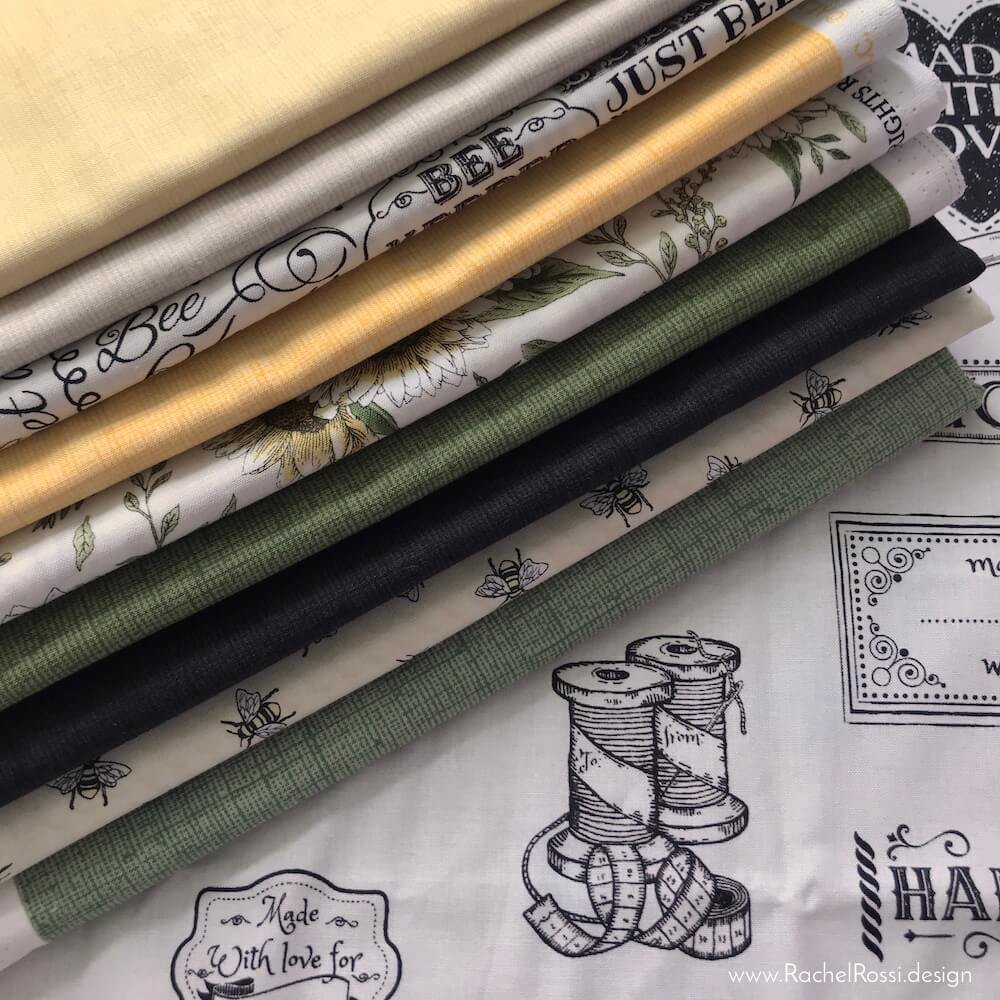
-9 Repeating Fabrics from the Hive Rules collection: 1/4 yard of each
-1 Fabric from the Hive Rules collection: 1/2 yard
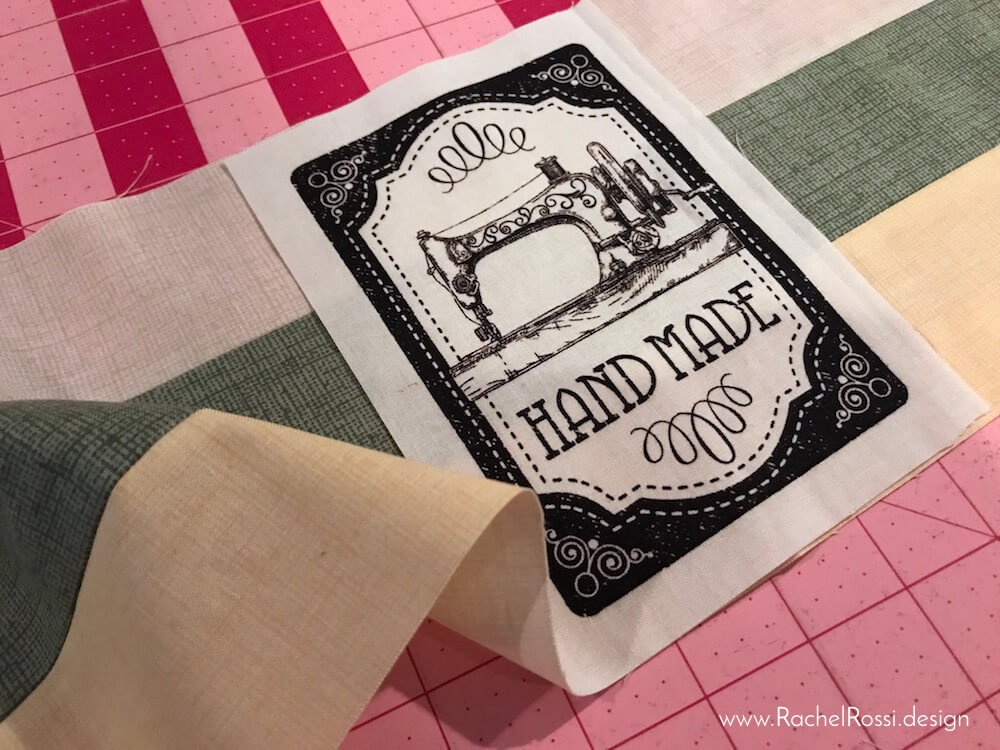
-OPTIONAL: 1 panel of quilting labels from the Hive Rules collection…just for an extra little jazz!
-OPTIONAL: 2 yards muslin or scrap fabric (backing – no one will ever know whether or not you used backing!)
This pattern is Jelly Roll friendly! If you’d rather use a Jelly Roll, you’ll only need 1/2 yard of fabric and your pre-cuts in addition to the supplies listed below:
-Insulbright Batting: 2 yards (Assumed to be 45″ wide)
-100% Cotton batting: 2 yards (Assumed to be 45″ wide)
-Elastic Cord: 40 inches
-Matching Thread
-Basting Spray
-Velcro (18″ of hook and 18″ of loop sides)
-Frixion Pen or erasable fabric marker
-Basic Quilting supplies: rotary cutter, mat, acrylic ruler, iron
Cutting
From the 1/2 yard of fabric, cut out two Nose Templates (download here!), remember to place the long edge on the fold of the fabric.
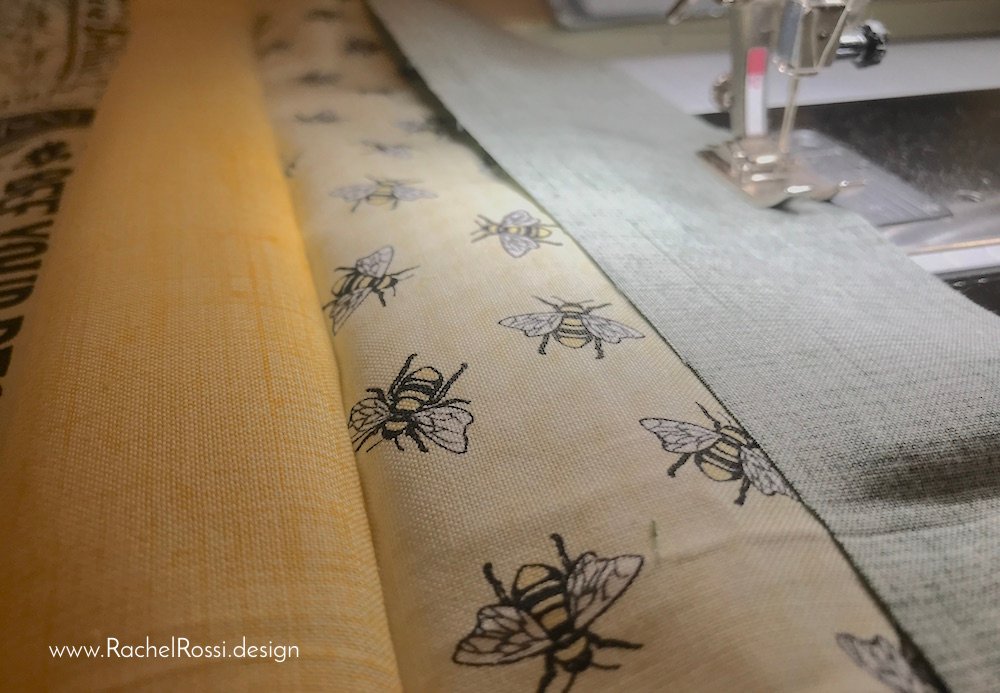
From all 10 fabrics, cut a total of (30) 2-1/2″ strips. Set aside 5 strips for casing.
Sewing
Note: All seams are assumed to be 1/4″ unless noted otherwise
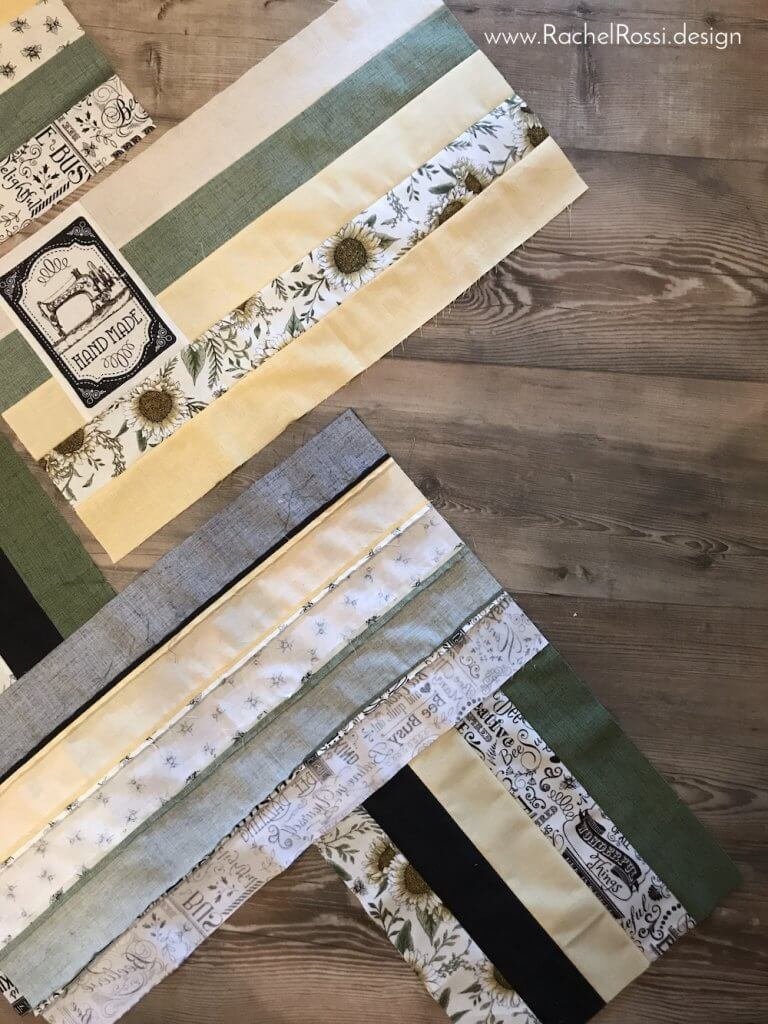
Start by stitching together 5 long strips. Use 1/4″ seam and press seams open. Repeat four more times for a total of 5 strip sets.
Adding Gems

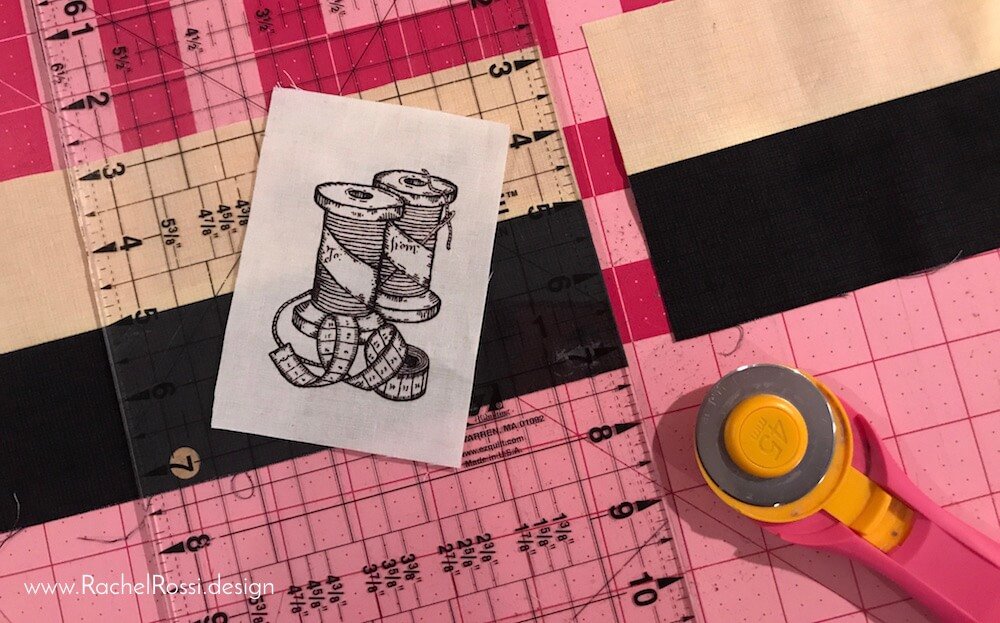
The Hive Rules collection includes this GORGEOUS set of labels for quilts, pillows, and other embellishments. I’ve deemed them as “gems” in my ironing board cover! If you’d like to add in some pieces from the panel, make sure to do it as you are creating the strip sets. For example you’ll sew together three strips, slice them, insert the “gem” and THEN you’ll continue sewing your five strips together.
Press seams towards the gems to reduce bulk.

To get the correct size, cut out each piece generously. Measure to see how you’ll insert the piece into the strip set. For example:
If your piece measures close to 5 inches, then you’ll place it within a strip set of two. The best way to make sure your measurements are correct is to place it on top of a sewn strip set to check your measurements. Here’s a helpful guide:
Number of Strips | Height of Gem
1 Strip | 2-1/2″
2 Strips | 5″
3 Strips | 6-1/2″
4 Strips | 8-1/2″
5 Strips | 10-1/2″

Feel free to add these beauties into your design. My suggestion would to be to keep them close to one end of each strip set though, this will ensure that they make it into the final design!
Back to Sewing!
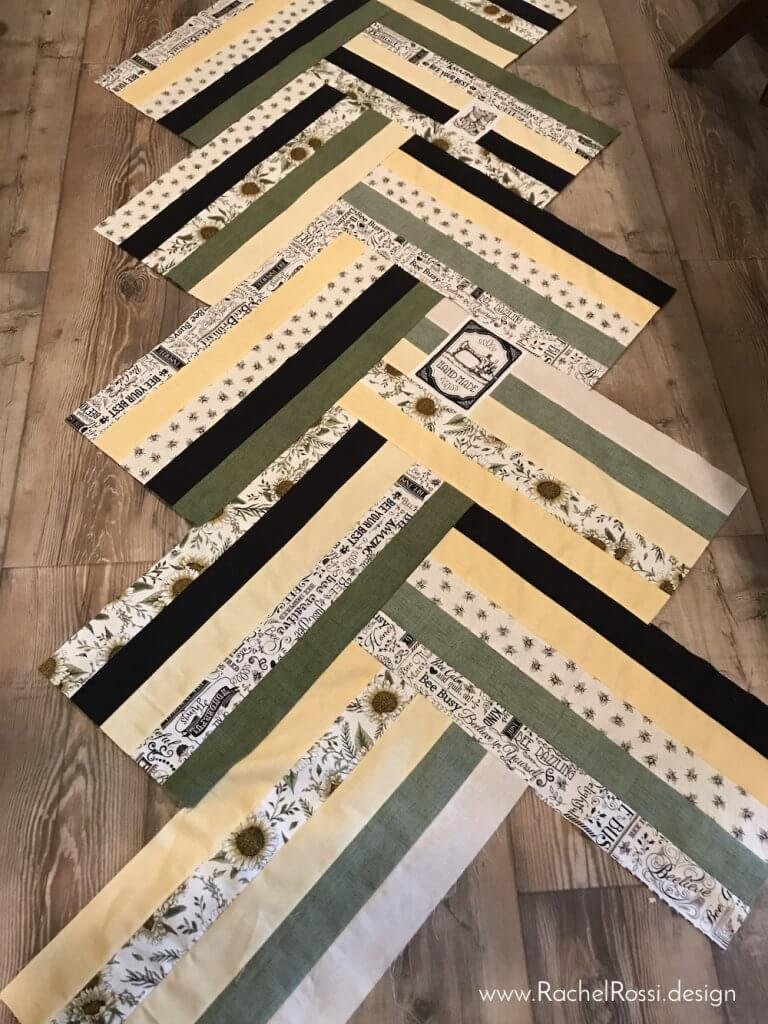
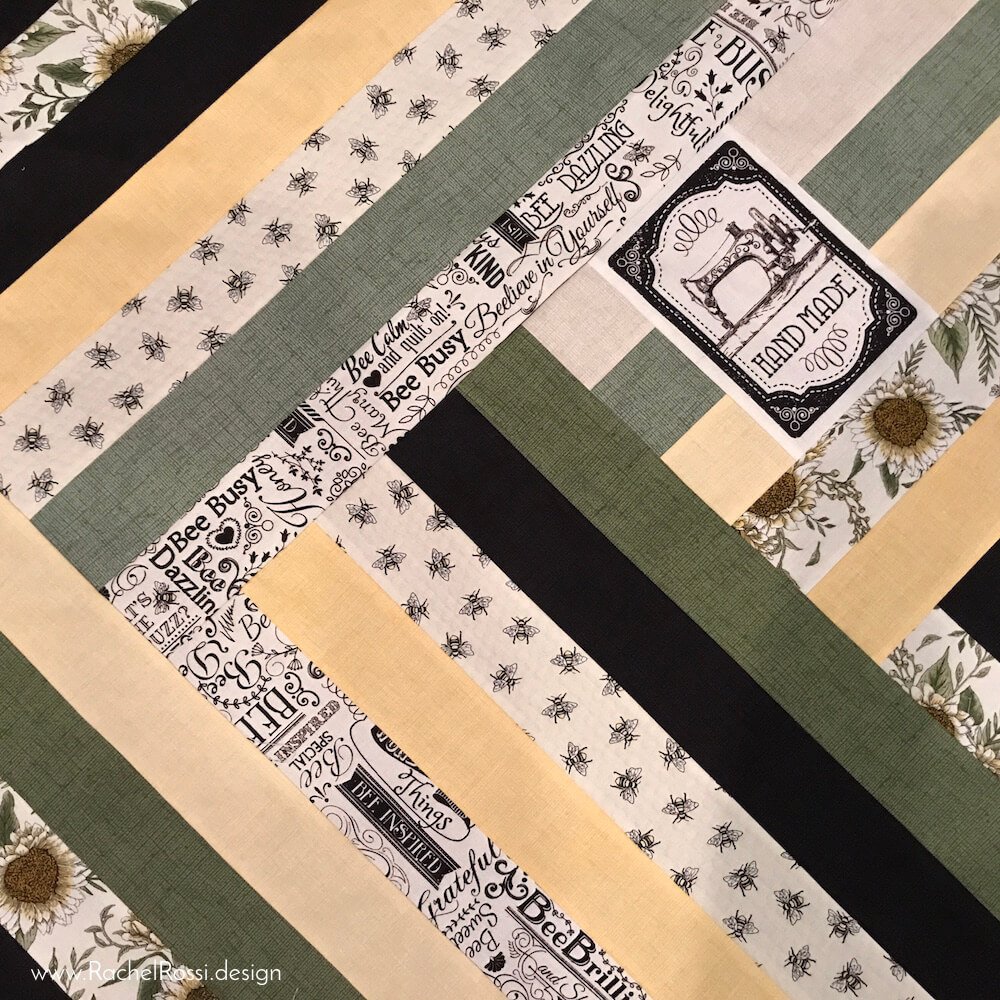
Once all strip sets are sewn and pressed, cut them in half, widthwise, to create (10) rectangles that measure about 10-1/2″ x 20″.
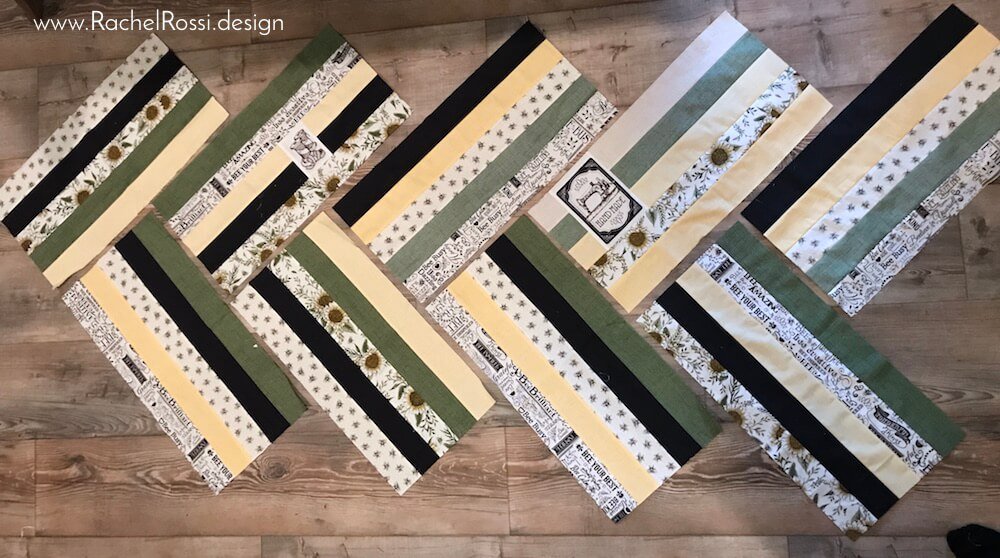
Now it’s time to arrange and re-arrange! Lay out the ten blocks as shown above and scoot them around until you’re happy with it! I found it helpful to lay it out on top of my ironing board to get the whole perspective.
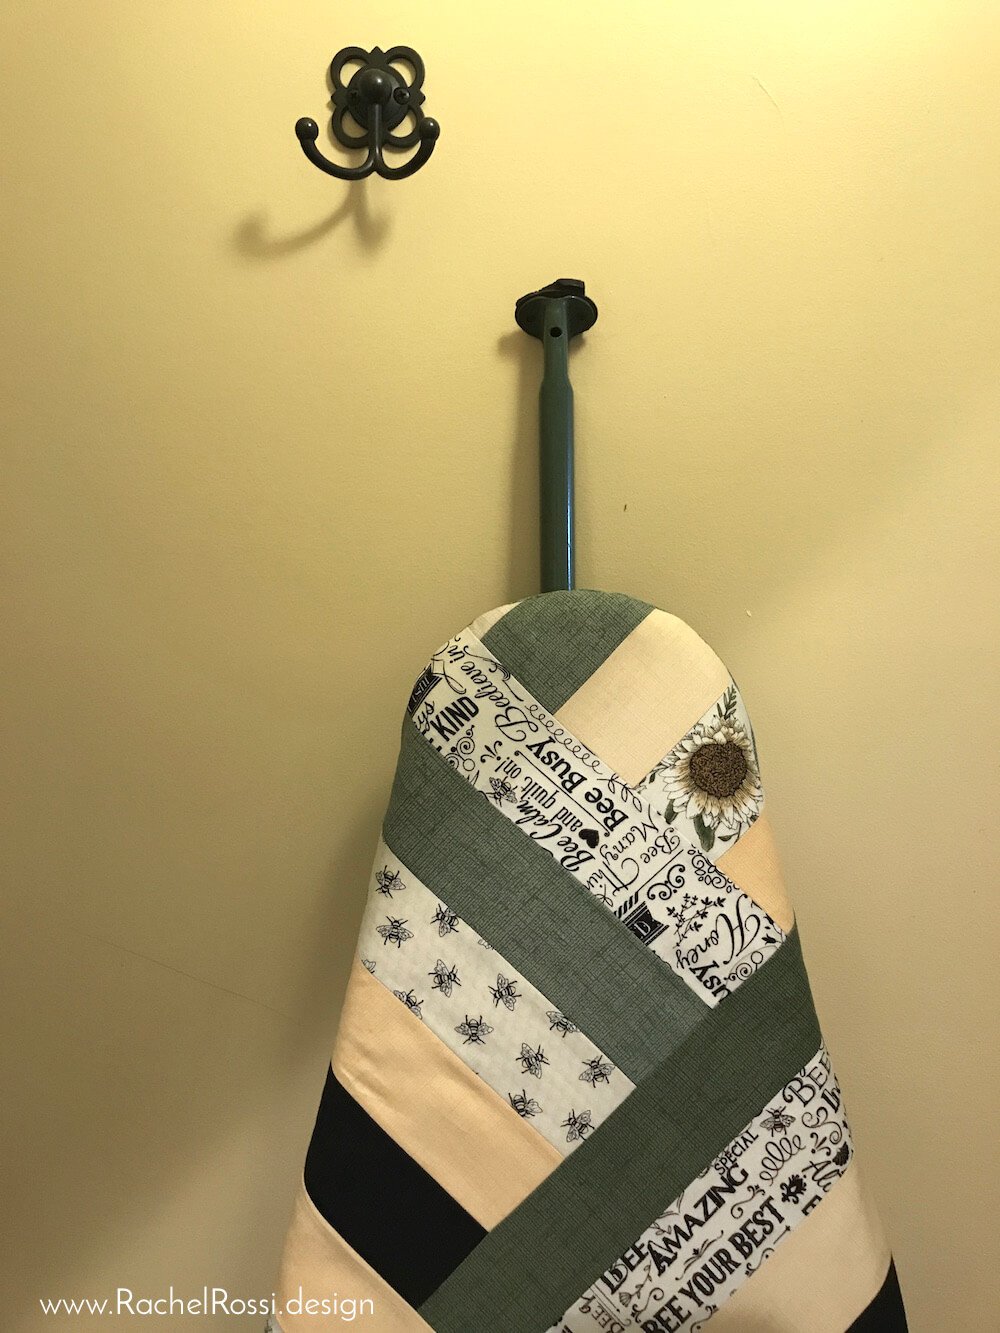
Sew the rectangles together starting from the right hand side. Sew one short end to one long edge as shown below. Press seams away from the existing seams for the flattest transition possible.

Next, you’ll sew the top right piece to the blocks you just sewed. Press and then add the left piece. Continue sewing in this order until all pieces are sewn together!
Using a rotary cutter, trim all triangles off the long edges, this will help you center your design.
Make a Quilt Sandwich

Now it’s time to make a “quilt sandwich” if you’re not familiar with this term, you’ll get it once I explain it. Note that you don’t have to quilt this cover. I left mine pieced, without quilting.
Whether or not you’ll be quilting your ironing board cover, you’ll want to create a quilt sandwich:
First, layer backing fabric with the wrong side up (this is totally optional- no one will ever see it!), cotton batting, Insulbright (shiny side up), cotton batting, cover top (right side up). Use spray baste in each layer to keep everything together. If desired, quilt the ironing board cover. If you don’t want to quilt it, move on to the next step!
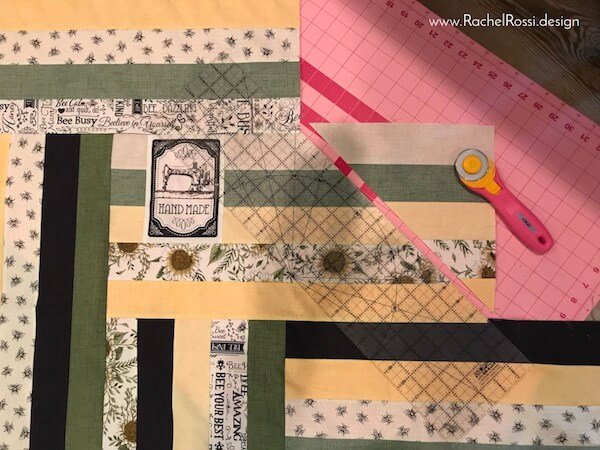
Cutting out the ironing board cover
Place the ironing board upside down on the cover top and make sure that it’s centered. Trace around the ironing board, adding 2-1/2 inches as you go. It’s easiest to slide your acrylic ruler under the board and measure out that way (see picture below).

Cut along the lines you drew and set aside.

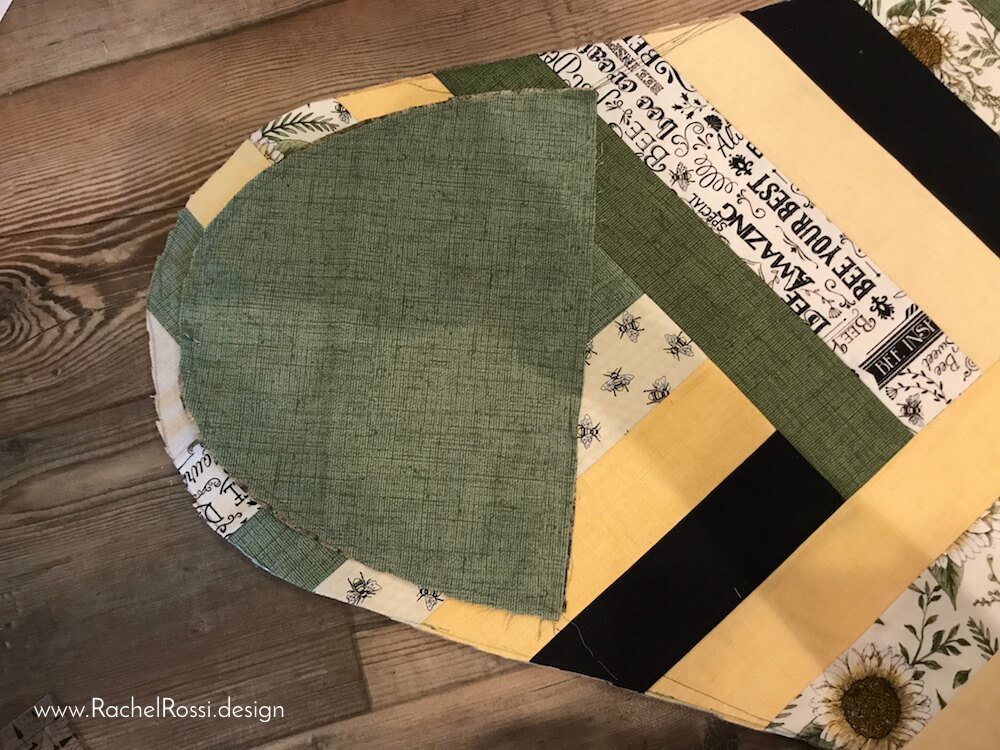
Creating the Nose
Take the two nose pieces that you cut out earlier. Match them WRONG sides together and baste along all edges.
Place the nose piece on top of your ironing board cover, about 3/4″ in from the edge (see image below). Using a Frixion pen, draw a line to ease in the sides. Pin in place and trim down the cover to match the nose piece and the lines you drew.
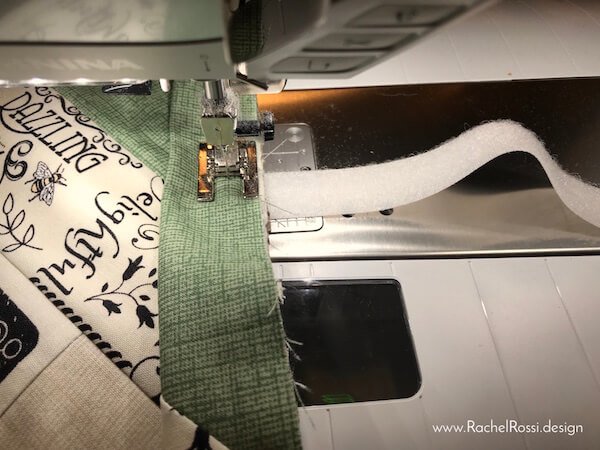
Sew the nose piece into place, making sure to backstitch. Stitch around the entire top curve with a generous 1/4″ seam.
Finishing Your Ironing Board Cover!
We are getting close now!
Cut two 9″ sections of Velcro, pin onto the BOTTOM of your ironing board cover. Note: These will stick OUT and away from the ironing board cover. You’ll want one side facing right side up and one side facing right side down. This will allow them to cross underneath the ironing board and join. Make sure the placement of these straps works and check the location of legs and posts on your board. You’ll want one set approximately 10″ from bottom and 26″ from nose. Baste into place and remove pins. Set aside.
Create the Casing
Finally, we will create casing, rather than binding to finish our cover off! Sew together the 5 remaining 2-1/2″ strips and press in half.

Turn the nose of the ironing board cover wrong side out. Then, matching raw edges, stitch the casing to the ironing board cover with 1/2″ seam. Sew around all edges, leaving a 3″ opening for elastic. Join casing edges as you would binding, you can see a full tutorial here if you’re not sure how to do that.
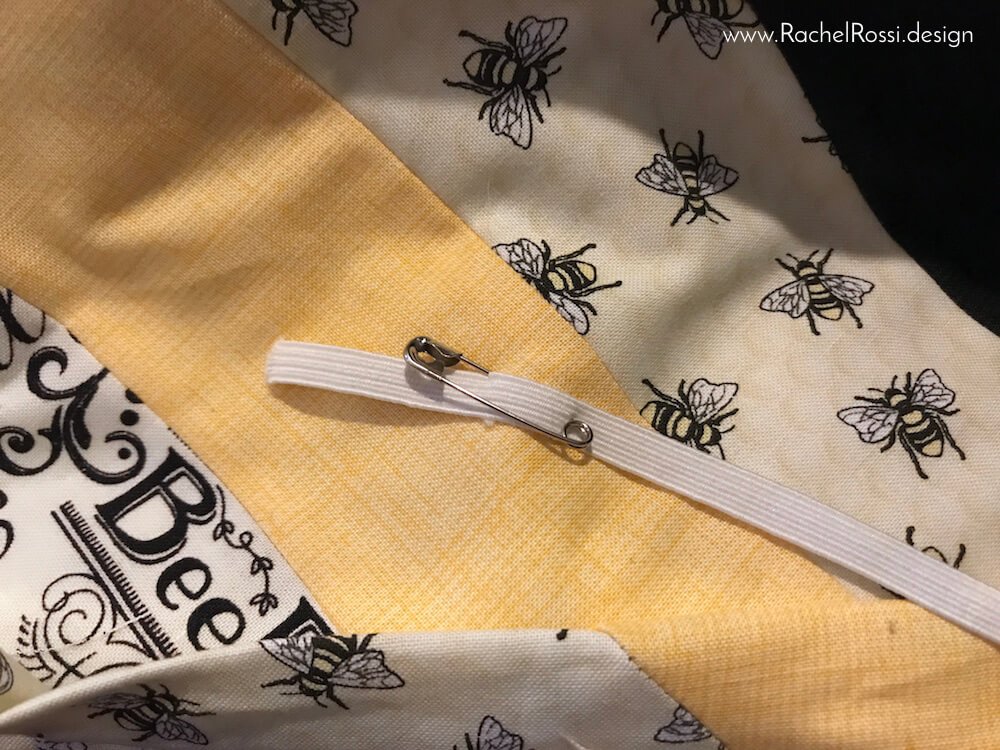
Thread the elastic cord through the casing. I strongly suggest pinning one end of the elastic to the project so that it doesn’t get lost in the casing as you thread it though.
Try on your ironing board cover for size and adjust cord length as needed. Sew or knot the elastic ends together and stitch the 3″ hole shut.
AND WE ARE DONE!


I hope you’ve enjoyed this tutorial, I’d love to see your finished projects over on my Facebook page or tag me on Instagram @DesignsbyRR. For more great tutorials and patterns, be sure to visit me at www.RachelRossi.design!
You Might Also Like

Do you close your ironing board? Mine is always 0pen.
I leave mine open, but it makes for a nice picture to have it closed! 😉
I love it. I’ve thought about piecing for my ironing board (My mom got it for a wedding gift in 1942) but wondered if the cover would create marks in the fabric I am ironing or pressing. May just give it a go anyway.
I wondered that before I got started as well. I’ve been using mine for about a year now and haven’t had that happen once! Go for it! 🙂