


It’s zipper day people.
This will probably be the most helpful part of the sew-along for you—i’ve got pictures of every step here to help you through the terrible tube of zippers! (I promise you’ll feel like a genius when you’re done with it though!).
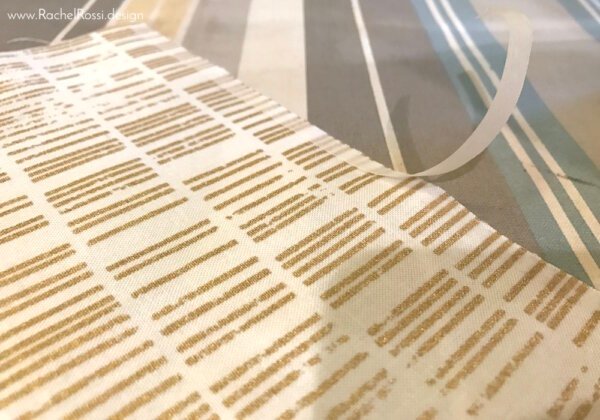
We’ll pick up where we left off last night at Step 6. Gather your zippers, pieces F, E, and I, and your fusible tape.
Once you’ve got your pieces fused together, it’s time to start stacking your pieces and zippers. You’ll want your first stack to look like this:
- Piece F, right side up
- Zipper, right side up (pull on left)
- Piece E, right side down with fusible tape sticking to zipper.
If you’re more visual, then this picture is what you’ll be looking at:

Now it’s time to sew it all together. I suggest using a zipper foot to get a nice straight edge. Then press the fabrics away from the zipper and topstitch. Yes…of course I did another 1/8″ topstitch!
Now that we understand what we are doing, it does save some time to add your fusible tape to the remaining pieces, so go ahead and do that quick.
Alright, we’ve mastered one zipper…now for the second! Move onto Step 7. You’ll want your stack to look like this:
- Piece F, right side up
- Zipper, right side up
- Zipper unit that you just created, right side down (zipper pull will be on top)

Sew, press, and topstitch like you did on the previous side.
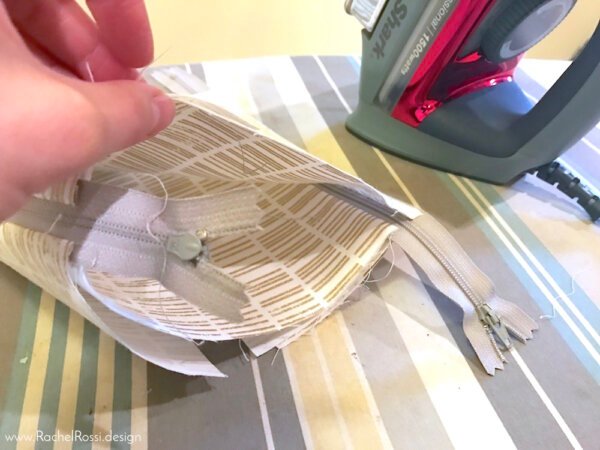
Now, take a look and make sure that you’ve done everything right. You should have a piece that looks like this (front and back):


Pat yourself on the back! You’ve got this!
Your next stack should look like this:
- Piece F, right side up
- Zipper, face up
- Zipper Unit, right side down

Onto the next (and final) stack!
- Piece F, right side up
- Zipper unit, right side up (so that the lining pieces are right sides together)
- Loop the zipper unit up, so that the right sides are together & create a tube
Now that we’ve got it all together, stitch along the zipper. Press right sides out and topstitch. Whew! We are through the worst of it! Zippers are never fun.
In Step 9 we’ll finish up the zipper pockets. Let’s turn this beast inside out and create the pocket portion of the zippers.
Here’s what it’ll look like when you sew along the 3 edges…not pretty, but it will be!

Trim those zippers and clip the corners. Don’t be afraid to trim a lot of the zipper away, if you’re worried about it, then sew over the part where the zipper joins the end a few more times.
Flatten everything out. Here, the pattern has you ironing, but I’ve found that my pockets turn out better if I just pin them flat, rather than ironing.
Alright—let’s see it! I want to see all the pieces that are going to make your beautiful wallet tomorrow!

I just found Day 4 of your blog on The Perfect Wallet, and this is the part that is really throwing me for a loop, but I am wondering if your entire blog for this project is still available. I’m new to purse making, and, for me, the instructions with the drawings are somewhat confusing – I find that the photos are much more helpful. I am hoping that your blog posts for the purse are still accessible. Thank you so much. Time to start ripping – I got really turned around on this zipper part!
Hi Margo!
You can see all of the posts here: https://www.rachelrossi.design/?s=perfect+wallet
I love the final product on this wallet, but yes, the pattern can get really confusing! I hope these help you!
Rachel, thanks for getting back to me quickly – your pictures were very helpful and I now have the pocket portion of the project finished. Aaaaand, my machine has some kind of problem now, but at least after I get it back from the shop, it will be much easier for me to finish up the wallet. But I’m really excited to have gotten this far and now I know it will get finished. Thank you, again SO MUCH! I have signed up for your emails, so am waiting to see what other ideas you share with everyone.