

Welcome to day 2 of the Crap, It’s Christmas! Sew-Along. Yesterday, we chose our fabrics, and today we’ll start in on the cutting. If you haven’t chosen your fabrics yet, be sure to hop back to Day 1 of the sew-along and get caught up. We’ll be moving at a pretty leisurely pace, so there’s always time to jump in!
Printing Your Pattern
If you haven’t already, get your pattern by heading on over to the shop and picking up your copy for just $1 (this price will only last during the sew along). Just use the promo code CrapItsChristmas at checkout.
Next step: print your pattern! A lot of people prefer to keep their pattern on the computer, but you’ll at least need to print your template sheets out. Make sure to follow the printing instructions carefully!
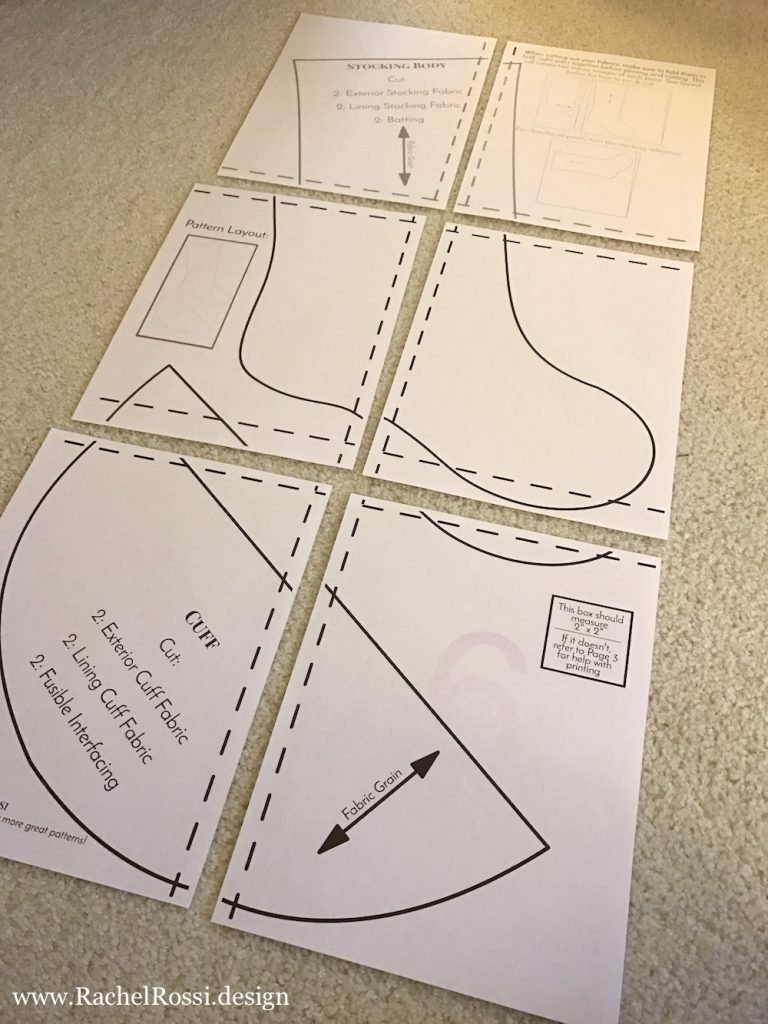
Taping the Template
Next, we are going to lay out our template pieces and tape them together. Simply lay everything out according to the diagram on page 3 of the template. Then, overlap the dotted lines on the edge of each sheet. Finally, tape them all together.


Loosely cut out the stocking body and cuff shapes from your template. Add extra tape if you’re worried about it coming apart.

Cutting out Fabrics
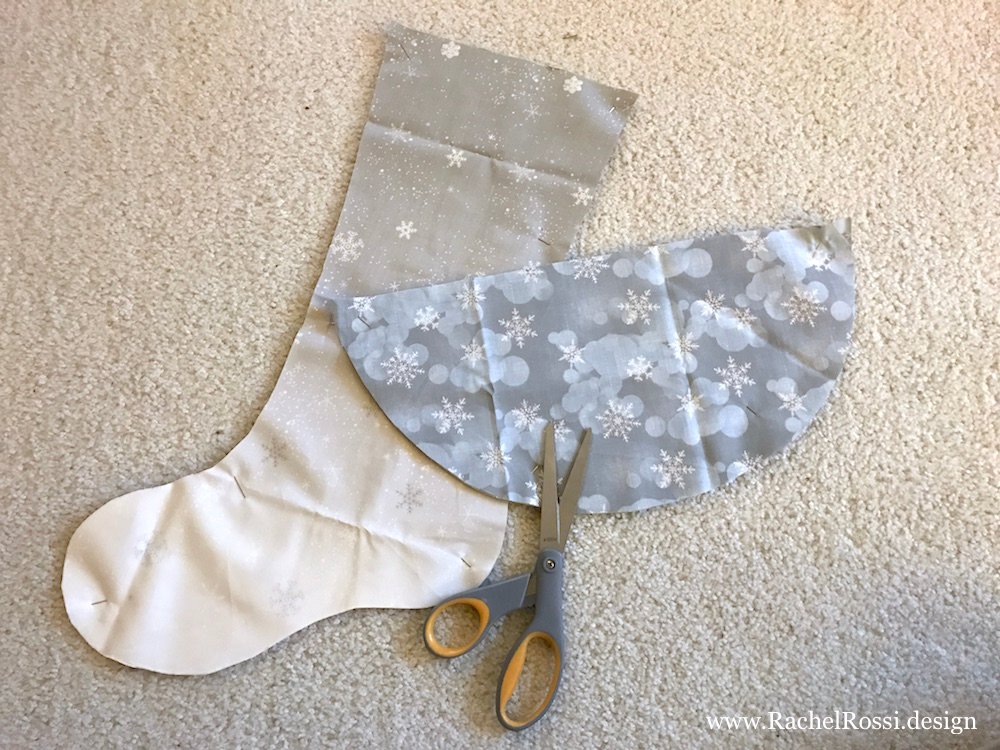
Now, take the first of your stocking body fabrics, and fold it in half with right sides together. This will ensure that you get two mirror images of the stocking body. Pin the stocking body template on top, as shown in the diagram, and cut out. Repeat for the second stocking body fabric.
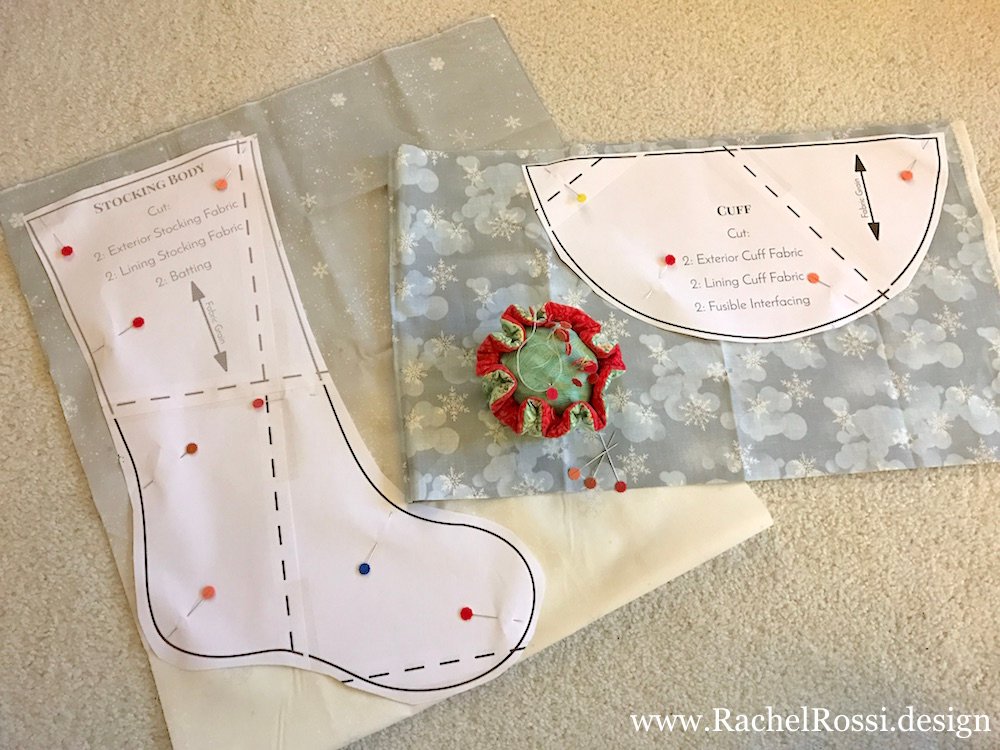
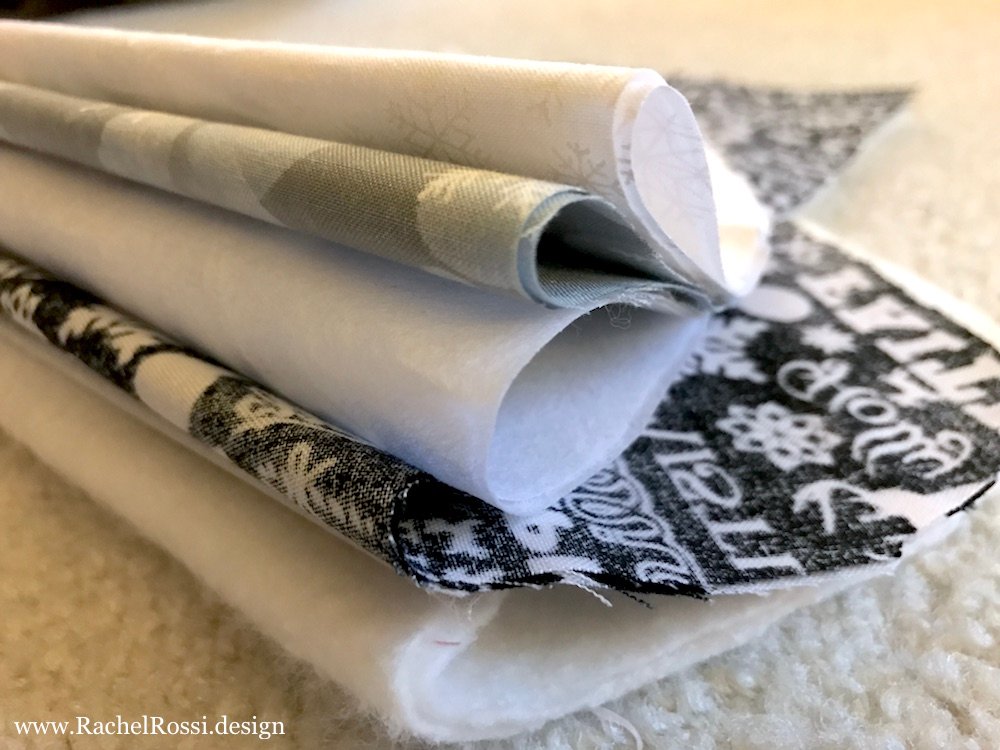
Next, fold the cuff fabric in half, right sides together. Pin as shown in the diagram and cut. Repeat for your second cuff fabric, interfacing, and batting.
Cutting out Ribbons
You’re just about finished! Cut your three pieces of ribbon to size, arrange everything so we can see it and snap a picture! Then upload it to Facebook or Instagram and be sure to tag me & use #CrapitsChristmas.
If you’re doing a bunch of stockings, make sure to do each step like an assembly line—things will move along much faster for you. All I can say is lather, rinse, and repeat!

I can’t wait to see your progress! Tomorrow we’ll be working on the ruffle and the cuffs. If you want to get a head start, be sure to read up on how to make a ruffle, or put it off until tomorrow…
Happy sewing everyone!
Enjoy reading this post? To make sure you don’t miss a thing, follow me on Pinterest, Facebook, and Instagram and sign up for an email subscription to my blog.
Recommended for this Tutorial
