


You always know that one of my upcoming patterns has something wild in it…I always come out with these really specific blog posts that seem a bit off the wall. This is one of those posts, BUT learning how to cut large triangles on the bias and keep things straight will be super helpful for you when you get started on my newest pattern because **drumroll please** Breezy will be making her debut NEXT WEEK! [Update: Here’s the pattern release!]

I can’t believe how this giant {and gorgeous} barn dwarfs this king-sized quilt!
I’ve been pretty excited about this pattern for a while now, and I’m not really sure why, but it just seems like I’ve been working on it forever! I think maybe my sense of time has been thrown off by the hundreds and hundreds of pinwheel blocks I’ve been making for the prototypes, testing rounds, and samples.

But today is not about pinwheels, it’s about something much, much bigger! How in the world do you cut that HUGE triangle on the bias and have a perfectly square quilt? Today, I’m going to show you how. It’s really not all that hard! I’ve got lots of pictures for you and a few words, but don’t get overwhelmed, it’s all about being gentle with your fabric and letting it do its thing! Let’s get to the tutorial!
Cutting Large Triangles on the Bias
Square It Up
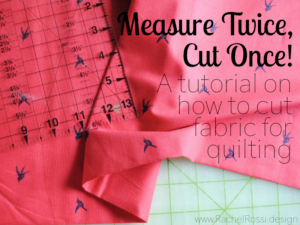
Squaring up your fabric at the beginning is the most important part of this process. Take your time here and you’ll be just fine! If you need help with squaring up and cutting, make sure to check out my Measure Twice, Cut Once tutorial.
First, fold your fabric in half so everything is looking fairly straight along the folded edge and the parallel raw edge. Whatever you do, don’t stretch your fabric! To resist the temptation, I kind of “scratch” my fabric up to where I want it, rather than grabbing and tugging on it.
Make sure that your piece is lying flat, without any wrinkles. Now, trim your raw edge to be straight.

Cut to Size
Now that we’ve got a straight edge, it’s time to cut it to size. I’m going to be shooting for a square that is 40.5″ on all sides, so that’s the number that I’ll be using from here on out. You can adjust this to fit your needs.
First, divide 40.5″ by 2. This gives you 20.25″. Measure 20.25″ from your nice straight edge and pinch the fabric to keep your spot.

Fold the fabric right where you pinched. Lay it flat on your cutting board and align it to be straight with the rest of your fabric piece.

Now, as things flatten out, you’ll notice that your raw edge should land right around 20.25″ (a little bit more is always fine too). Double check to make sure all layers are lying flat.

Place your ruler on the 20.25″ mark and make a cut all the way up your fabric.

Perfect, now repeat this in the opposite direction to get a perfect square.
Chop It in Half
It’s time to chop this beauty…I know, it’s terrifying, but it’ll all be OK, promise!

Make sure you got a perfect square by folding your fabric in half. Without tugging or pulling, do all the corners match perfectly? If so, head on to the next step, if not, let’s keep tweaking it until it’s right!

Leave your triangle folded in half, as shown above. Rotate it so that the fold is perfectly straight with a line on your cutting mat.

Line up the top tip to be perfectly on point with the bottom fold.

BEFORE YOU EVEN THINK ABOUT CUTTING!!! Place your ruler on the center line (whichever line the top point ends up on) and get it straight. Take a peek inside your fabric to make sure that the cut has the right placement. I must have checked 1,000 times before cutting since it really matters on this panel!

Make sure nothing shifted while you were peeking and go for the cut! If you don’t have a super long ruler, stack a few on top of each other to make sure you’re getting a straight cut. Then cut very slowly and carefully.

Now you can rip it open and make sure once again that everything looks just right! There you have it, two perfectly square giant fabric triangles!
Hopefully this little quilting tutorial will take a bit of the fear out of my up-and-coming pattern, Breezy. It’s such a fun project and I’ve got lots of fun tricks for pinwheels blocks and half square triangles inside—you’re going to love it. Check back next week for the big release and get all the details then!
For now, I’ll leave you with some other really helpful tutorials on cutting fabric:
Enjoy reading this post? To make sure you don’t miss a thing, follow me on Pinterest, Facebook, and Instagram and sign up for an email subscription to my blog.